
Why Should I Grow My Own Veggies?
Growing your own food is incredibly rewarding, and not just because you get to say, "I grew that!" It comes with numerous benefits that extend far beyond simply having fresh produce at your fingertips.
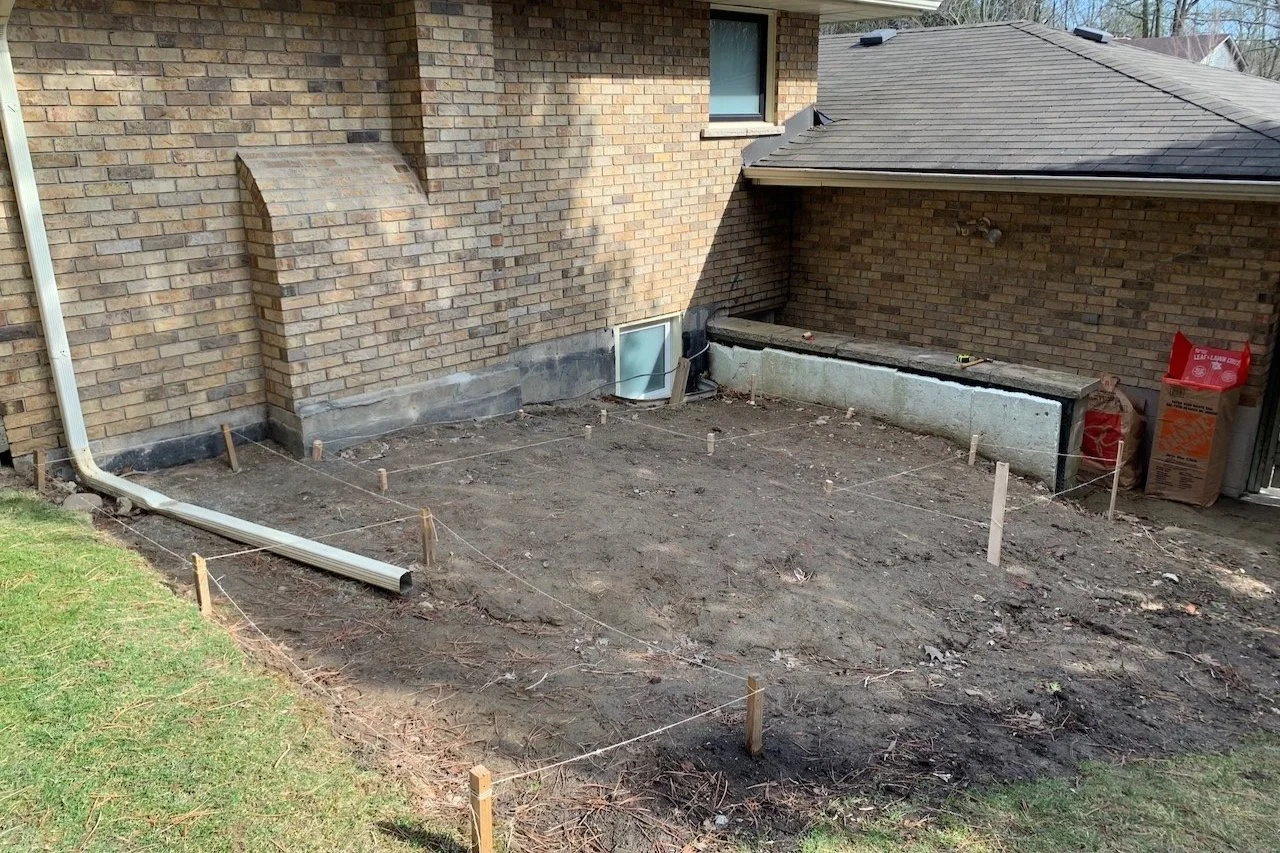
Finding The Right Spot
Your first step to creating your own vegetable garden is finding the best spot for it on your property or balcony. It is possible to grow your own food in almost any type of space. We will dive deeper into each topic to consider for finding the right spot for your new garden.
Growing Conditions
In Finding the right spot we discuss the crucial factors that contribute to your garden's success and guide you in choosing the best location for it. We'll delve into the specific growing conditions you need to consider based on your area.

How to Plan Your Vegetable Garden
Sketching your garden bed on paper is an excellent way of visualizing your garden layout end ensure everything has it’s proper place, but not everyone is a talented artist. So what can you do? Here is a step-by-step guide to get you started

What To Grow (Including Easy Veggies To Grow)
If this is your first time growing vegetables, it’s perfectly fine to start small. Avoid overwhelming yourself with too many options. Your first growing season will involve some trial and error, and it’s okay if everything isn’t perfect.
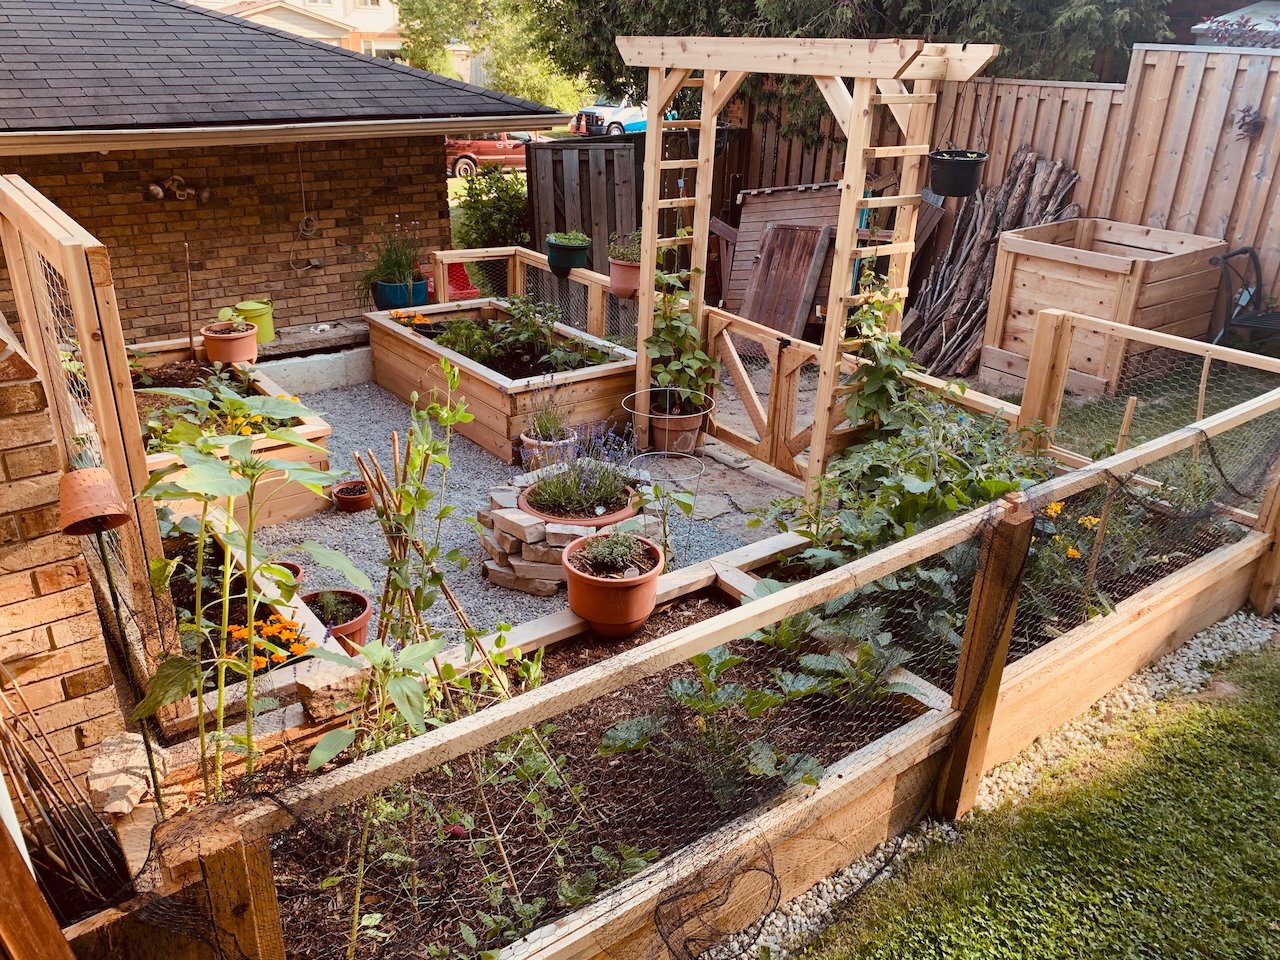
Raised Beds or Not
There are some things to consider when it comes to adding raised beds into your garden (or not). Raised beds offer numerous advantages for vegetable gardening, but it's important to account for various considerations that will be different for each person.
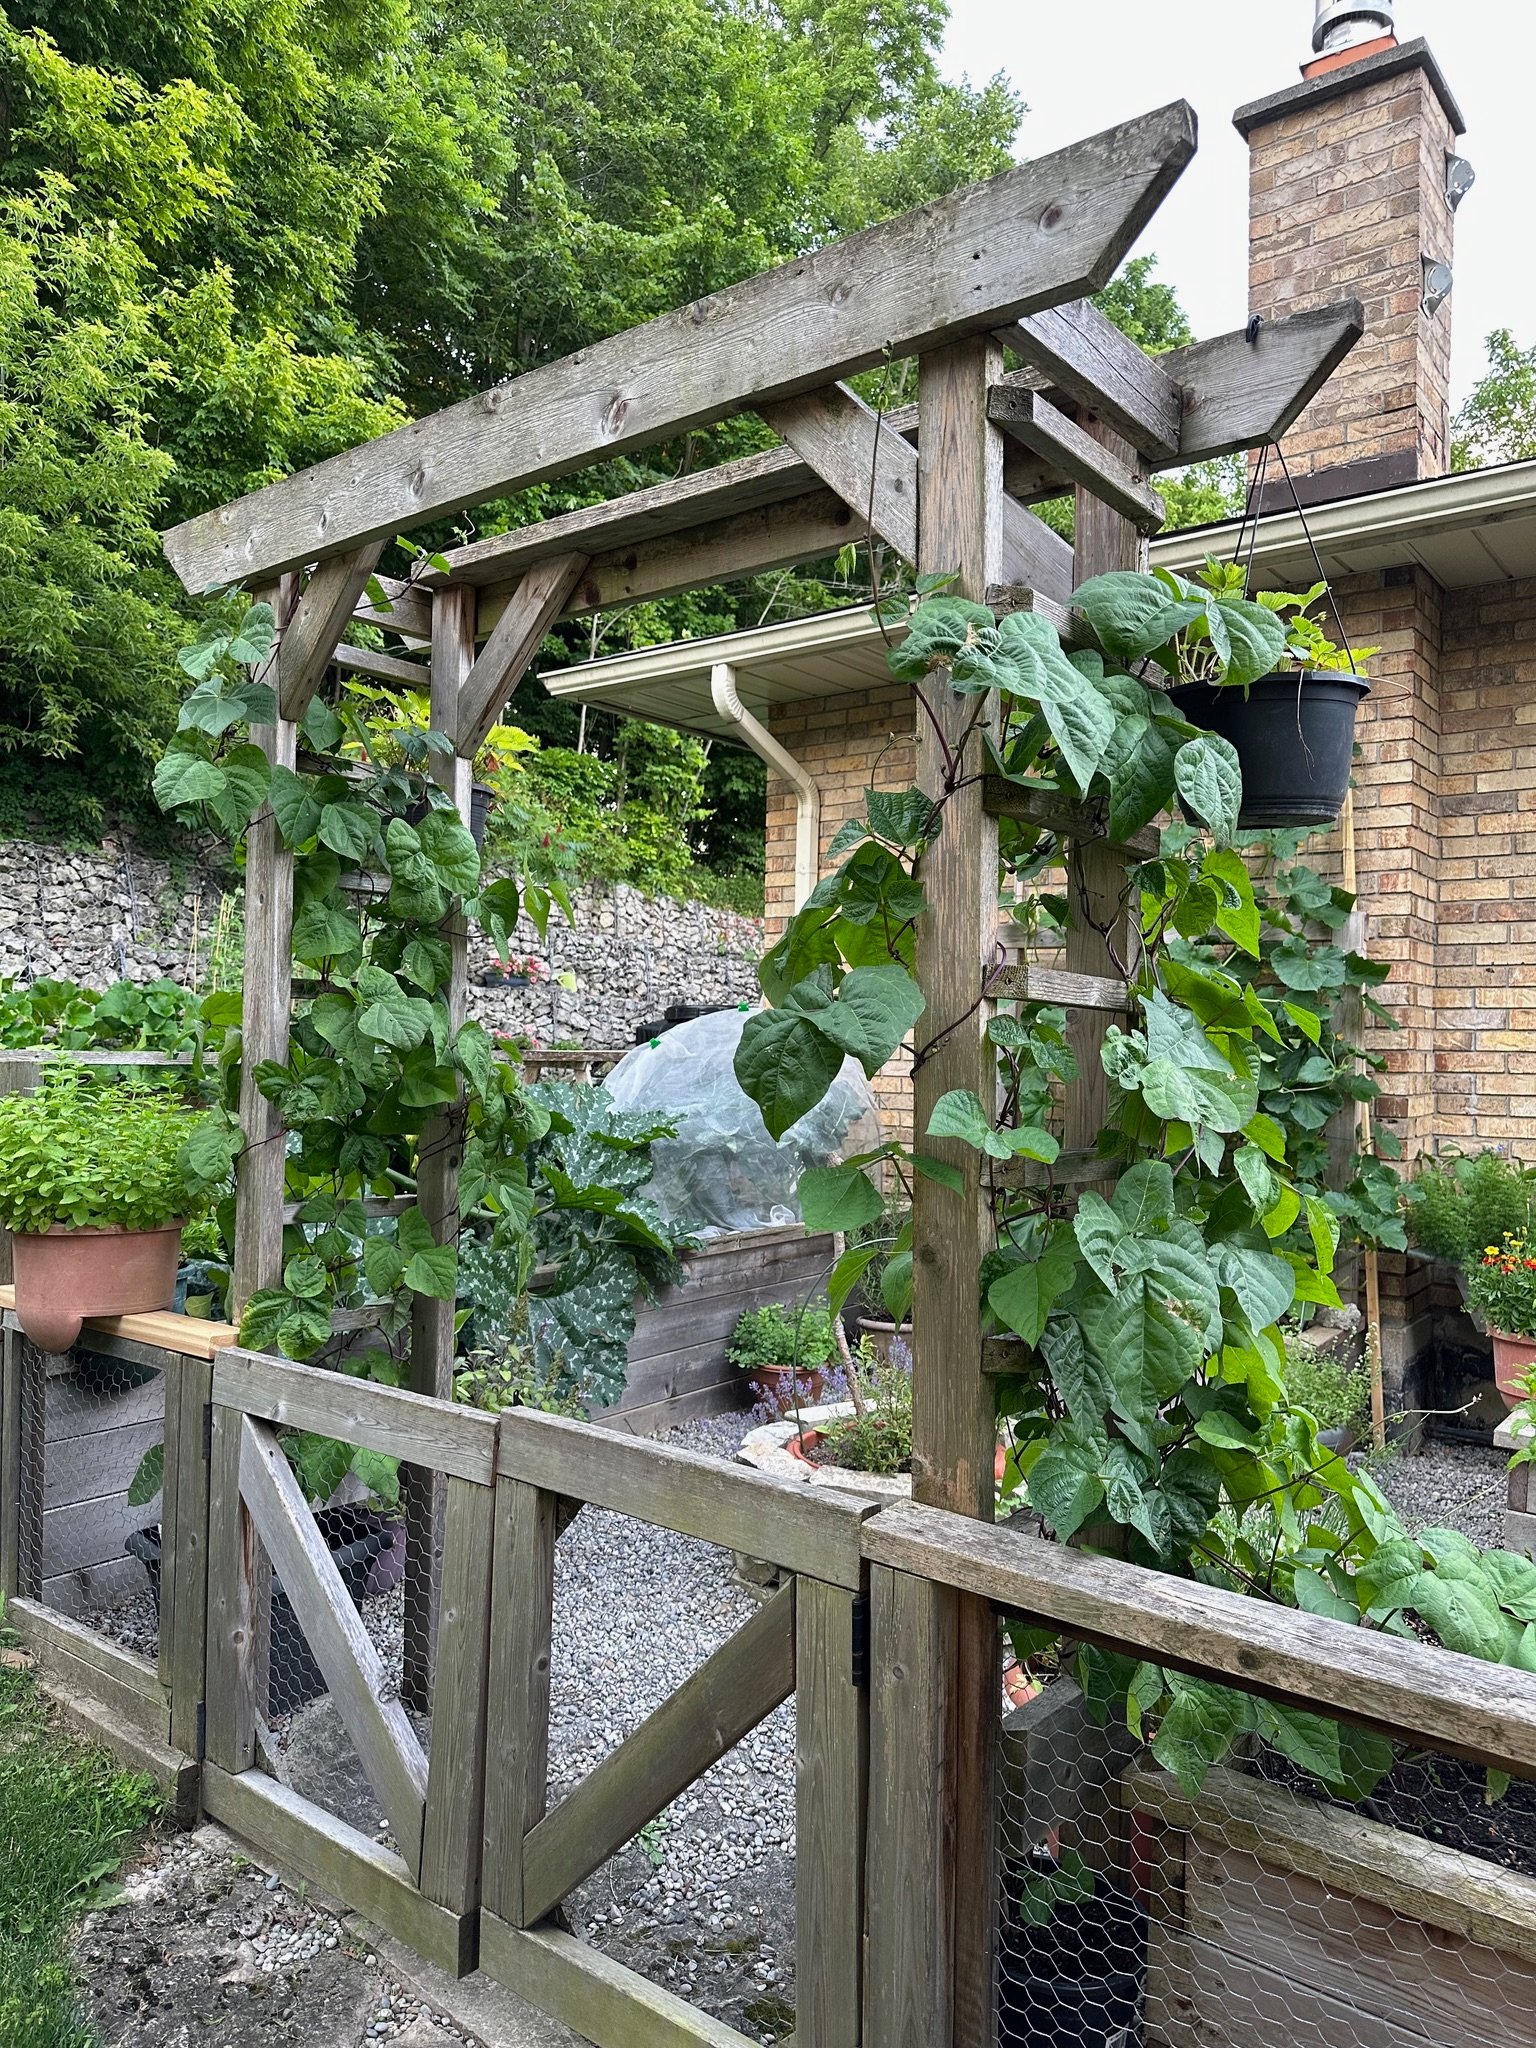
The Garden Trellis
A trellis is a versatile garden structure designed to support plants as they grow. It can be constructed from various sturdy materials, with wood, metal, and plastic being the most common options. Trellises come in a variety of shapes and sizes, allowing you to select one that suits both your available space and the specific needs of your plants.

Make A Seed Starting Schedule
When you purchase seeds, the packaging typically includes information about when to start planting indoors. It will specify the number of weeks before the last frost date to sow your seeds. To determine the exact planting time, simply count backwards on your calendar from your local last frost date.

Gather Your Supplies
Starting seeds requires just a few simple supplies: seed starter mix from your local garden centre, containers, and water.
We've grown seeds in various containers, from toilet rolls to fruit containers, old plastic cups, peat pellets, and plug trays.

Prepare Your Containers
Over the years, we have accumulated pots of various sizes—some donated by family and friends, and others acquired with greenhouse purchases. Reusing pots is an excellent way to save money while also benefiting the environment. Since most pots aren’t recyclable and often end up in landfills, repurposing them is a fantastic way to reduce waste.

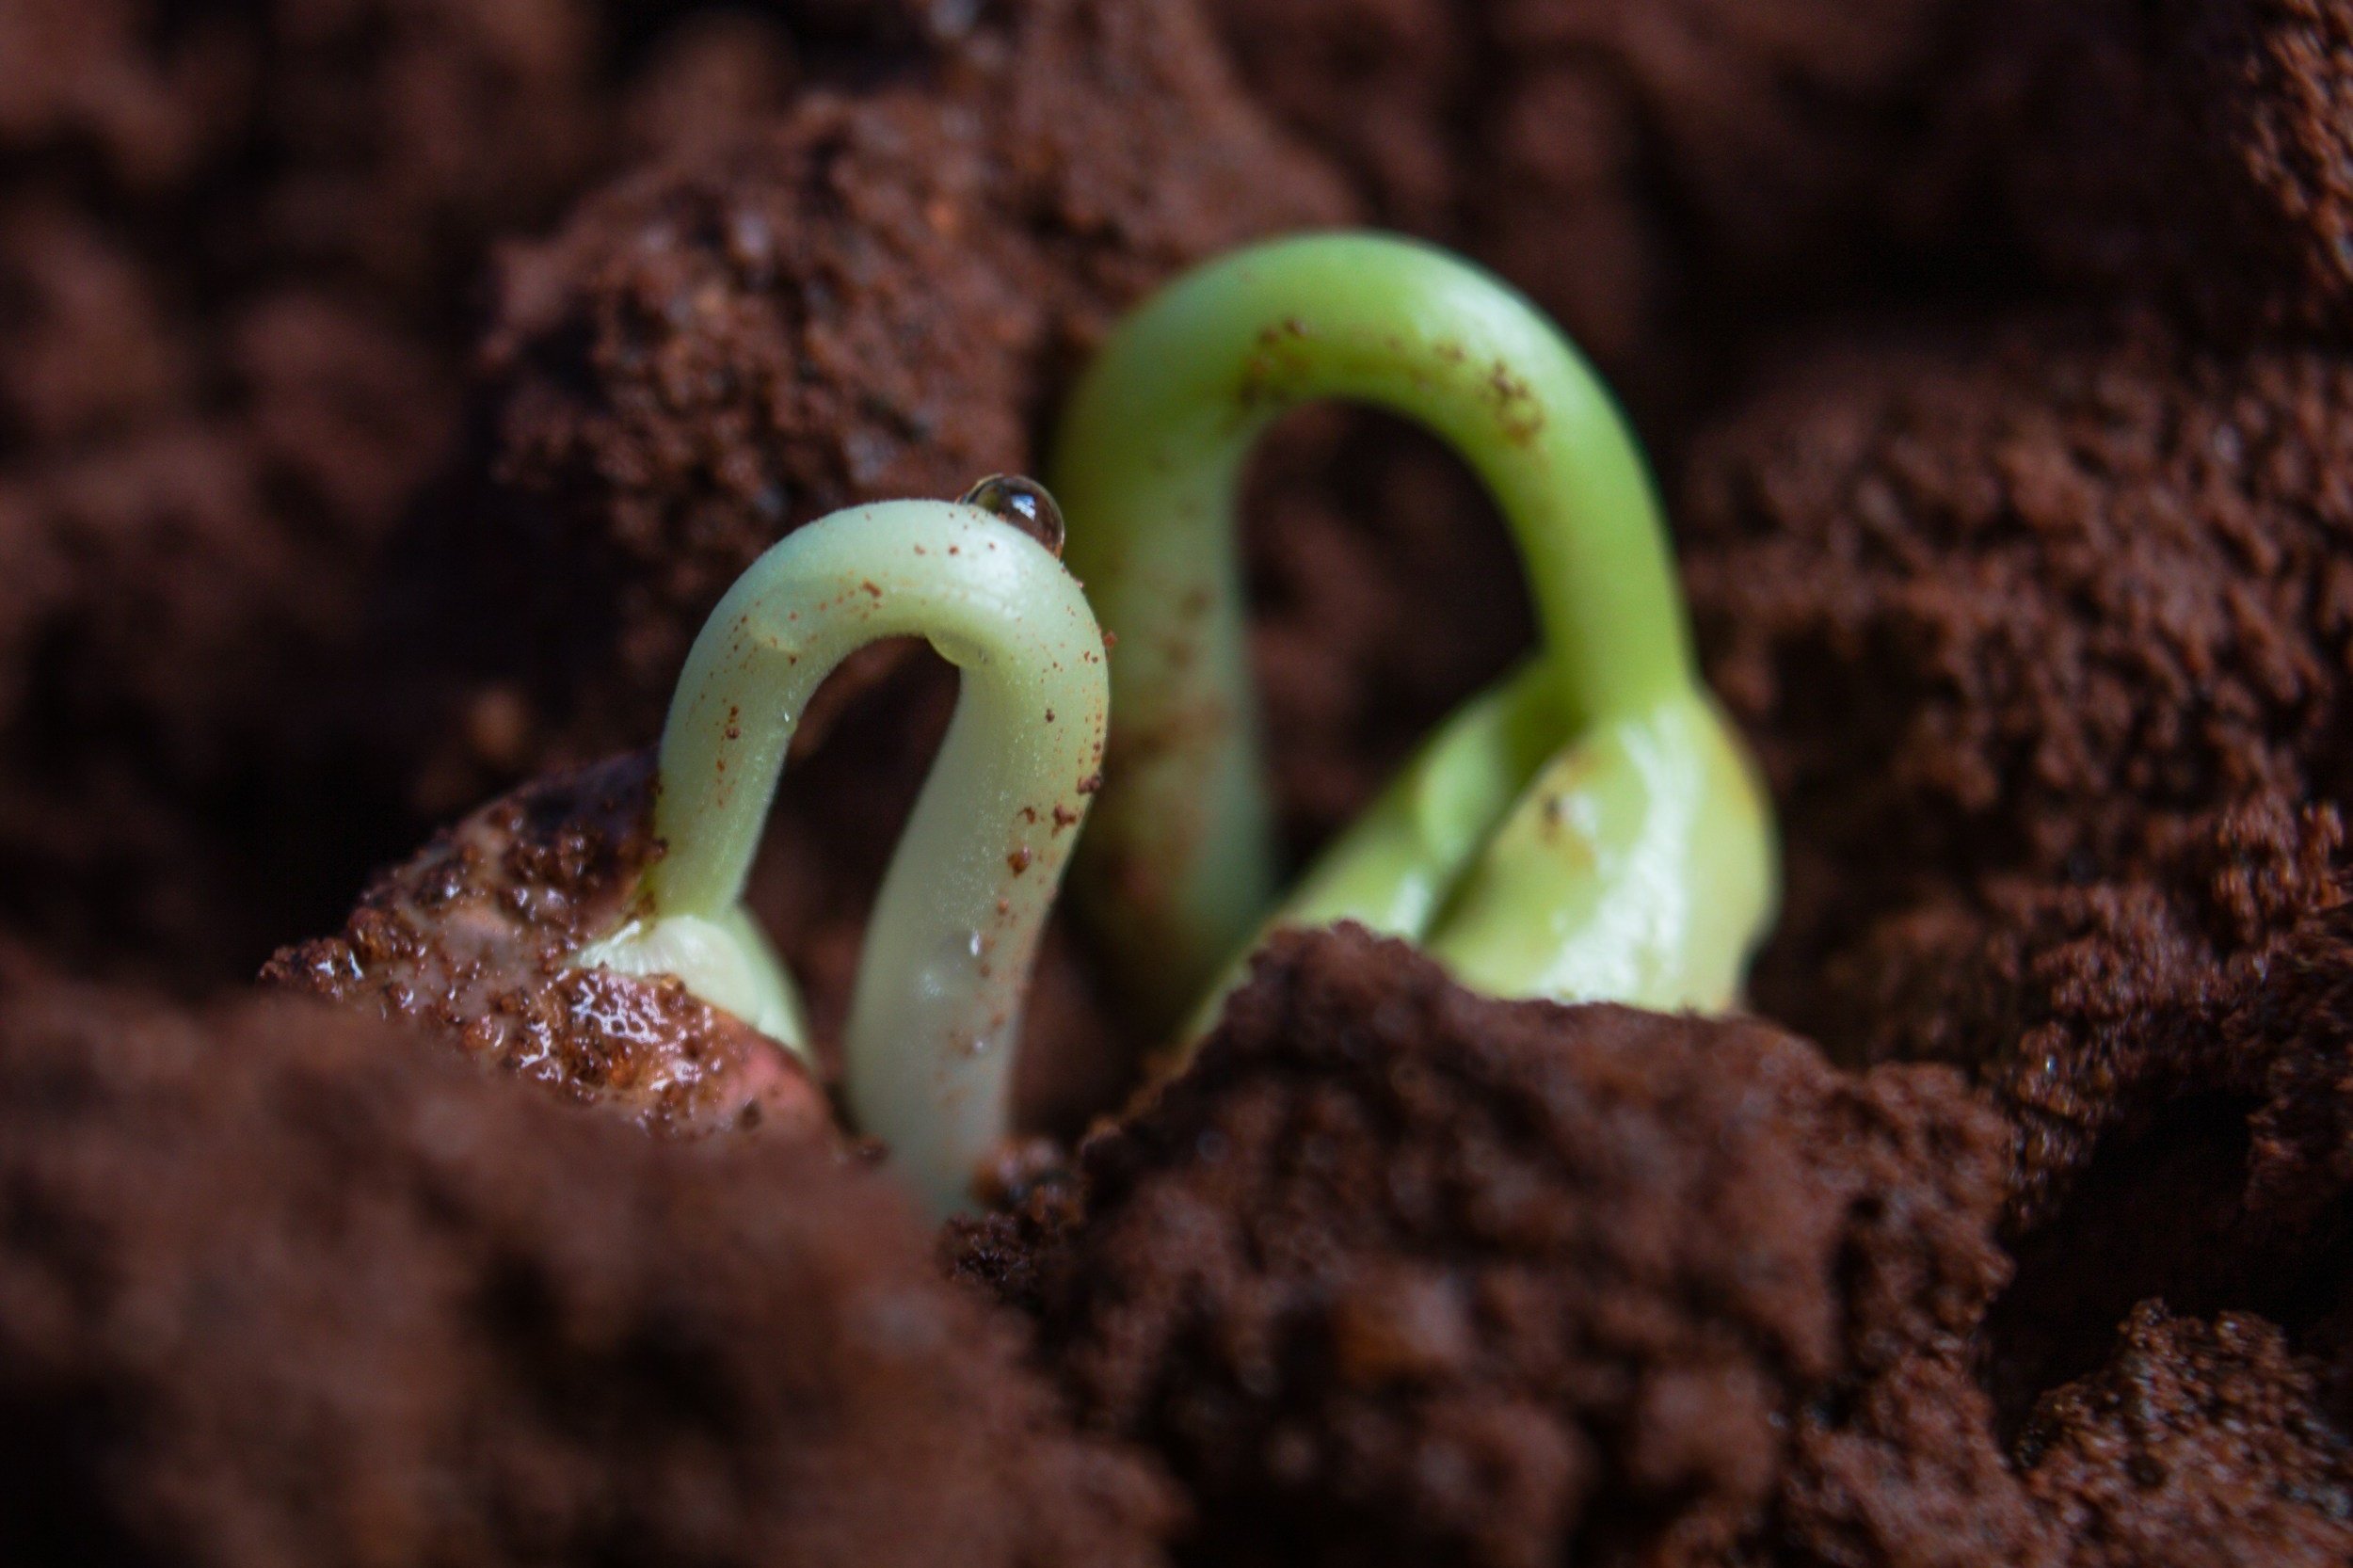
Sow The Seeds
Finally, you’ve prepped your containers and gathered your supplies—now it’s time to start your seeds!
Before distributing seeds in your pots, it's crucial to read the labels. Different seeds have specific growing conditions, and to successfully germinate them, you need to know precisely what they require.

Label Your Seedlings!!!
We can't stress this enough! We've been caught so many times thinking, "I'll just finish this and remember it tomorrow," only to have our brains go on vacation overnight. Trust us, labels are crucial unless you enjoy surprise gardening adventures!

Provide Light
Most seeds need plenty of light to germinate. Place them in a sunny spot or use grow lights to provide 12-16 hours of light per day.
A south-facing window is a great place to start your seeds. However, if your winters are long and dark, consider purchasing grow lights, as even a south-facing window might not provide enough sunlight during winter.

Temperature
Seeds generally germinate best at temperatures between 65-75°F (18-24°C). Some seeds might require a specific temperature range, so it's wise to refer to the seed packet. If you received gifted seeds or picked them up from your local seed library, you can search for the germination codes online or use this handy tip…

Keep the Soil Moist
Let's Talk Water!
Seeds thrive in a humid environment during germination. To maintain humidity, cover the containers with a clear plastic lid or plastic wrap, but ensure there’s proper ventilation to prevent mold growth.

Provide Airflow
Improving airflow around your seedlings is essential for their healthy growth and to prevent issues like mold and damping-off.
Here are some tips to enhance airflow…

Thinning and/or Transplanting Seedlings
Thinning seedlings might sound a bit brutal, but it’s all about giving your future plants the best shot at success. Think of it as the plant version of a VIP club—just with fewer velvet ropes and more dirt under your nails. Skipping the thinning process is like inviting everyone to a party but only having enough snacks for half the crowd.

Harden Off Your Plants
Seedlings need to be hardened off to prepare them for the harsher outdoor conditions they will face once transplanted from their sheltered indoor environments. This gradual process helps them adjust to variations in temperature, wind, and sunlight.

Transplanting
Transplanting can be a bit like moving to a new home — exciting but a bit stressful. By following these steps, you'll give your seedlings the best chance to settle in and flourish.

Harvesting Seeds
Harvesting seeds is another important part of your seasonal garden calendar! If you enjoyed your produce and would like to plant it again, you can simply save some seeds for next year, especially if they were hard to come by initially.