How to Plan Your Vegetable Garden

Sketching your garden bed on paper is an excellent way of visualizing your garden layout end ensure everything has it’s proper place, but not everyone is a talented artist. So what can you do? Here is a step-by-step guide to get you started:

Measure Your Space:
You'll need a measuring tape (preferably long and flexible), a notepad, and a pencil. A few stakes and strings might also come in handy. We love using stakes and string when working with clients, as it helps them visualize garden beds better. Once you have those stakes and string in place, you may be surprised how big the garden actually will be, and you can easily adjust it now.
Before you start measuring, sketch a rough outline of your garden area on paper. This will help you visualize the space and note down measurements. Start by measuring the length and width of your garden area. If the space is irregularly shaped, measure all sides and note the measurements on your sketch. If your garden is large or has multiple sections, divide it into smaller, more manageable parts. Measure each section individually and mark them on your sketch.
Identify and measure any fixed features in your garden, such as pathways, trees, sheds, or fences. Mark their positions and dimensions on your sketch. If your garden has slopes or uneven terrain, take note of these areas. They might require special attention when planning your garden layout. For example, your freshly laid soil will erode with the next rainstorm unless you have some ground cover to keep it in place (wild strawberries make excellent ground covers, by the way).
Draw Your Outline:
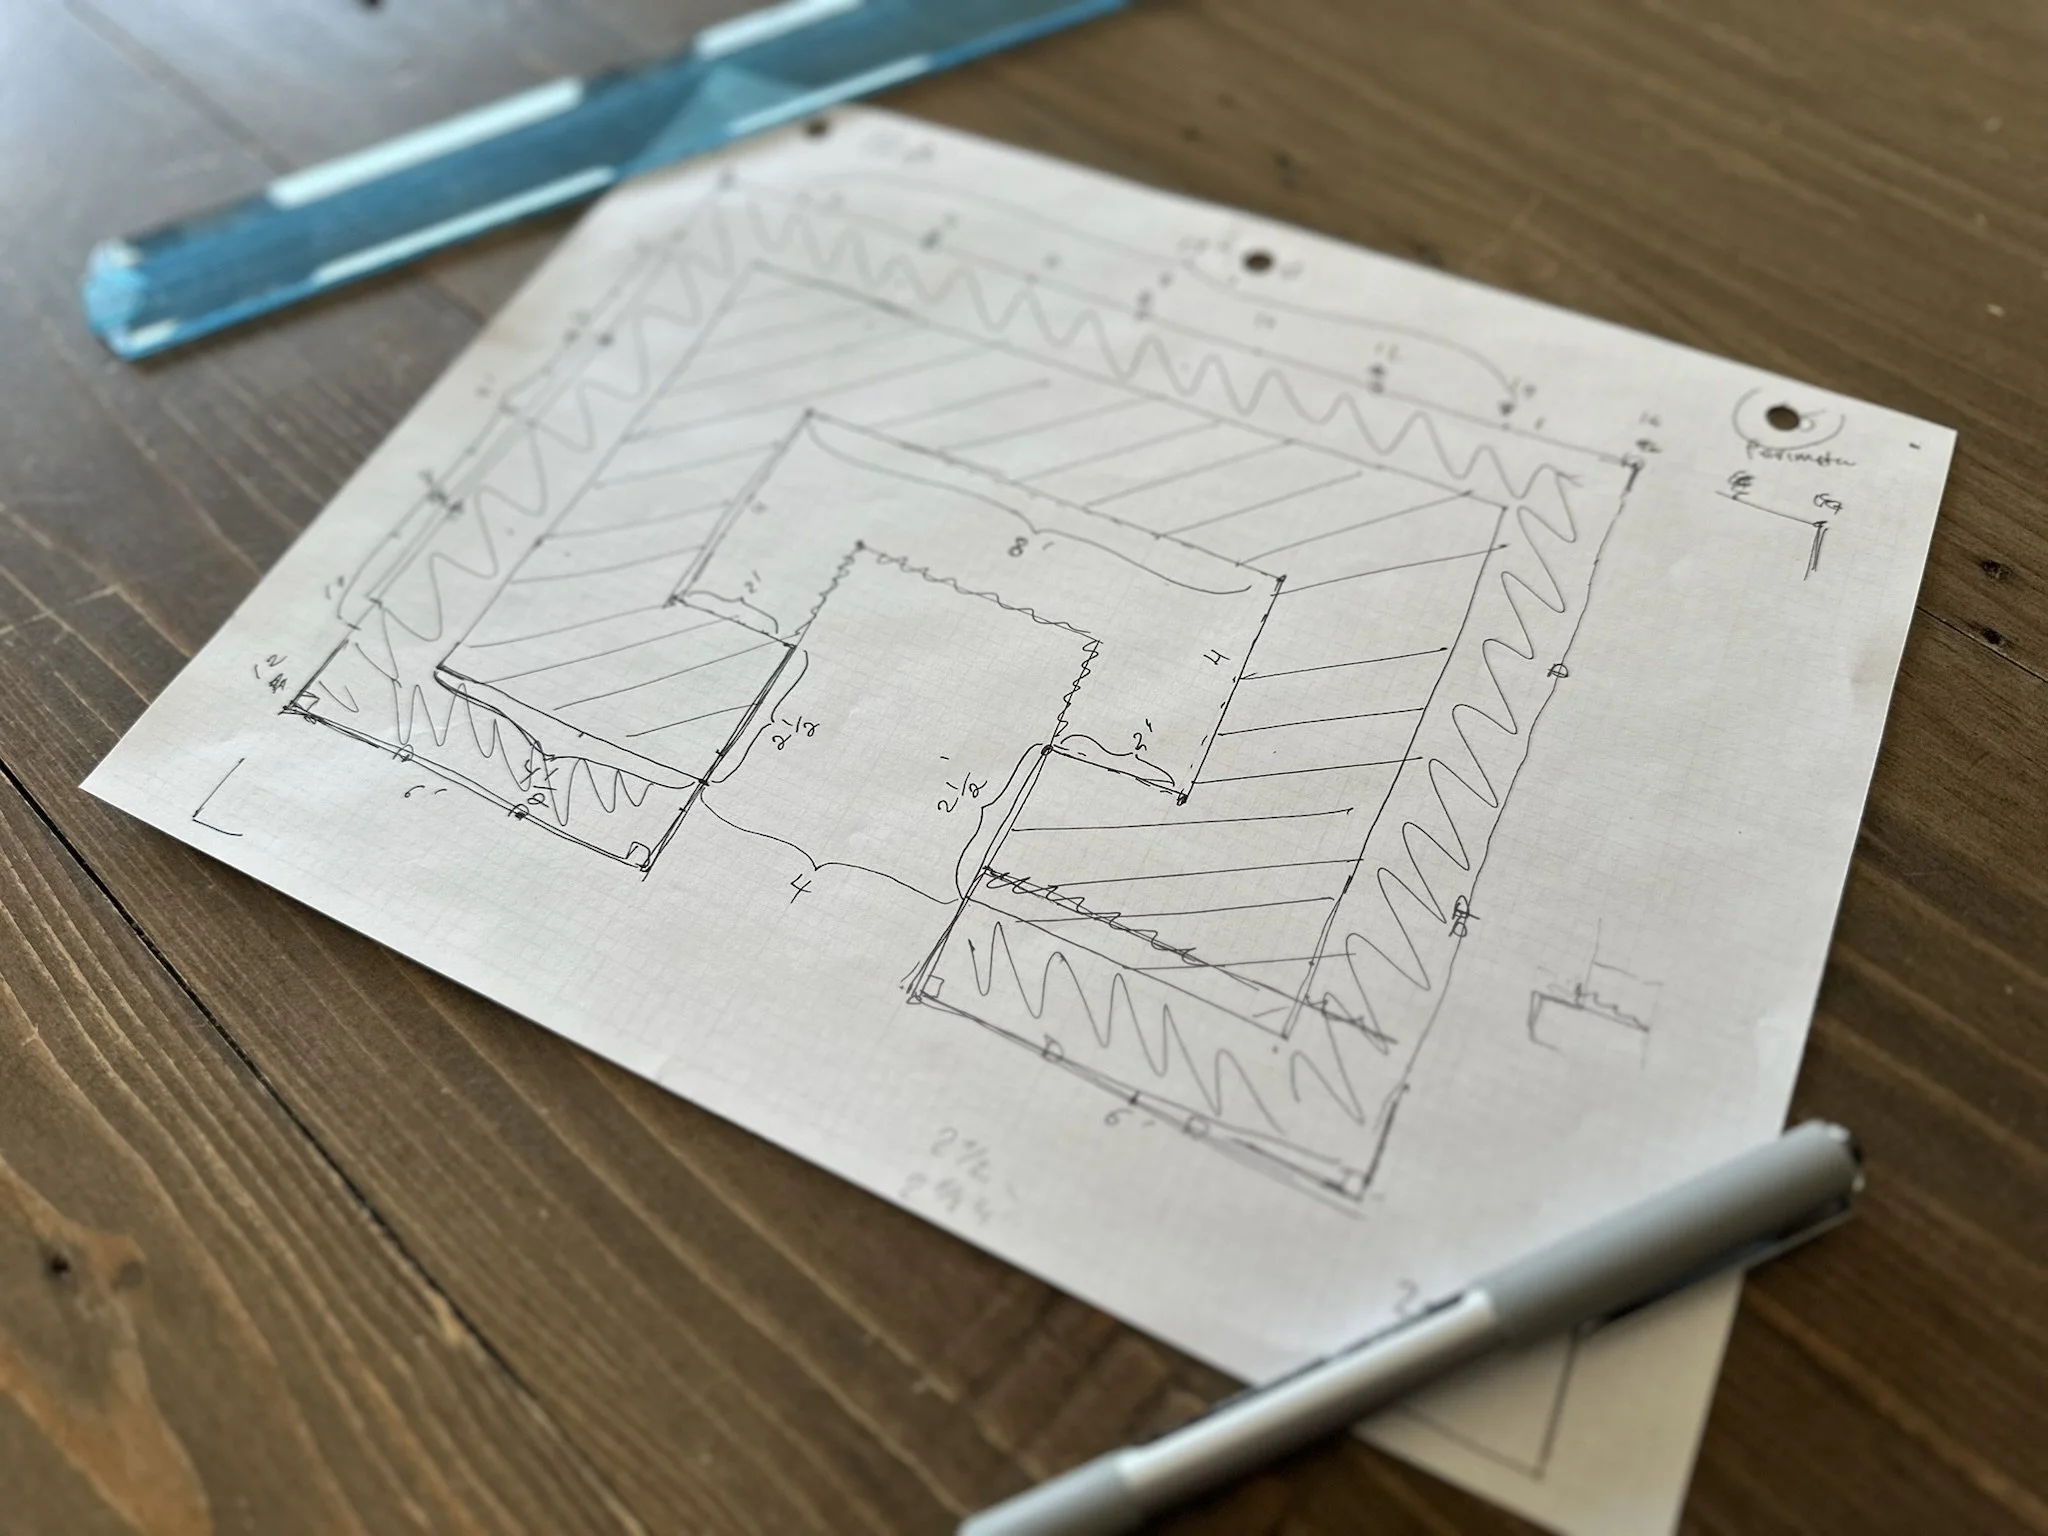
Once you've gathered all your measurements, create a scaled drawing on graph paper. For example, you can use a scale of 1 square = 1 foot (or meter).
Using your measurements and scale, draw the outer boundaries of your garden on the graph paper. Use a ruler to keep your lines straight. If you want to include fixtures, now is the time to add those. Mark any permanent features within your garden, such as trees, sheds, pathways, and fences. Measure and draw these features to scale in their correct positions. If these features have irregular shapes, try to simplify them into more manageable forms (e.g., represent a round tree canopy with a circle).
Next, add your garden beds and paths. Draw the shapes and positions of your garden beds, keeping in mind the dimensions you want them to be. Include pathways for easy access and make sure to leave enough space between beds for you to walk and tend to your plants.
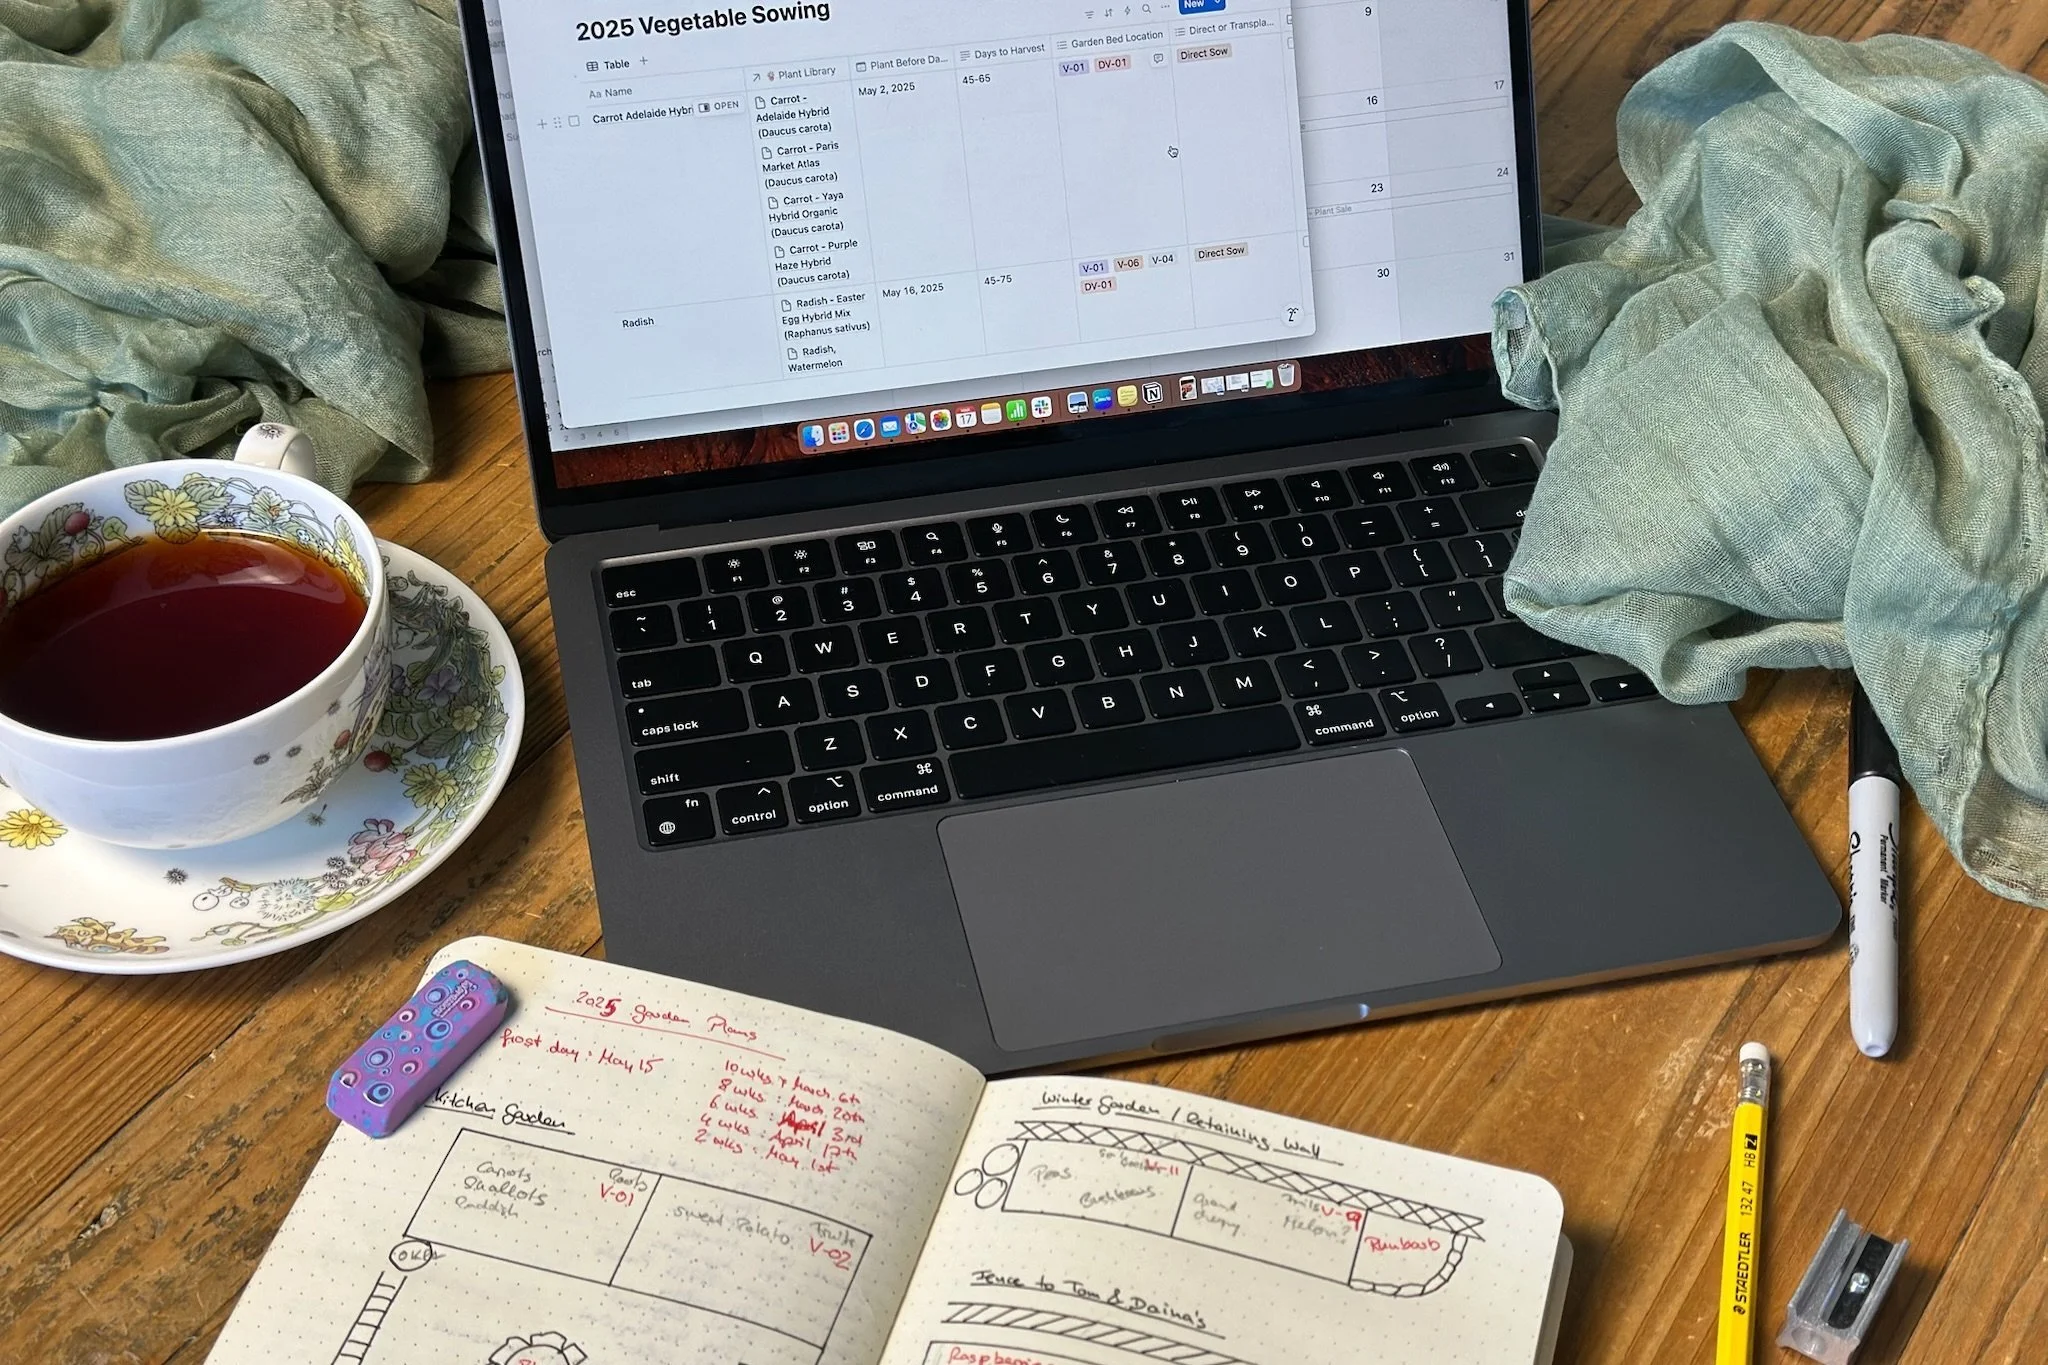
Lastly, clearly label each part of your garden. For example, note where specific garden beds, trees, or pathways are located. We start to give our garden beds code names, which will come in handy in the future when you’re planning crop rotations. We tend to use our clients' first names with "V" for veggie beds and "F" for flower beds, followed by a number, so for example, BV-01, BV-02. If you can, also indicate any areas that receive specific amounts of sunlight (e.g., full sun, partial shade).

Designing your garden beds:
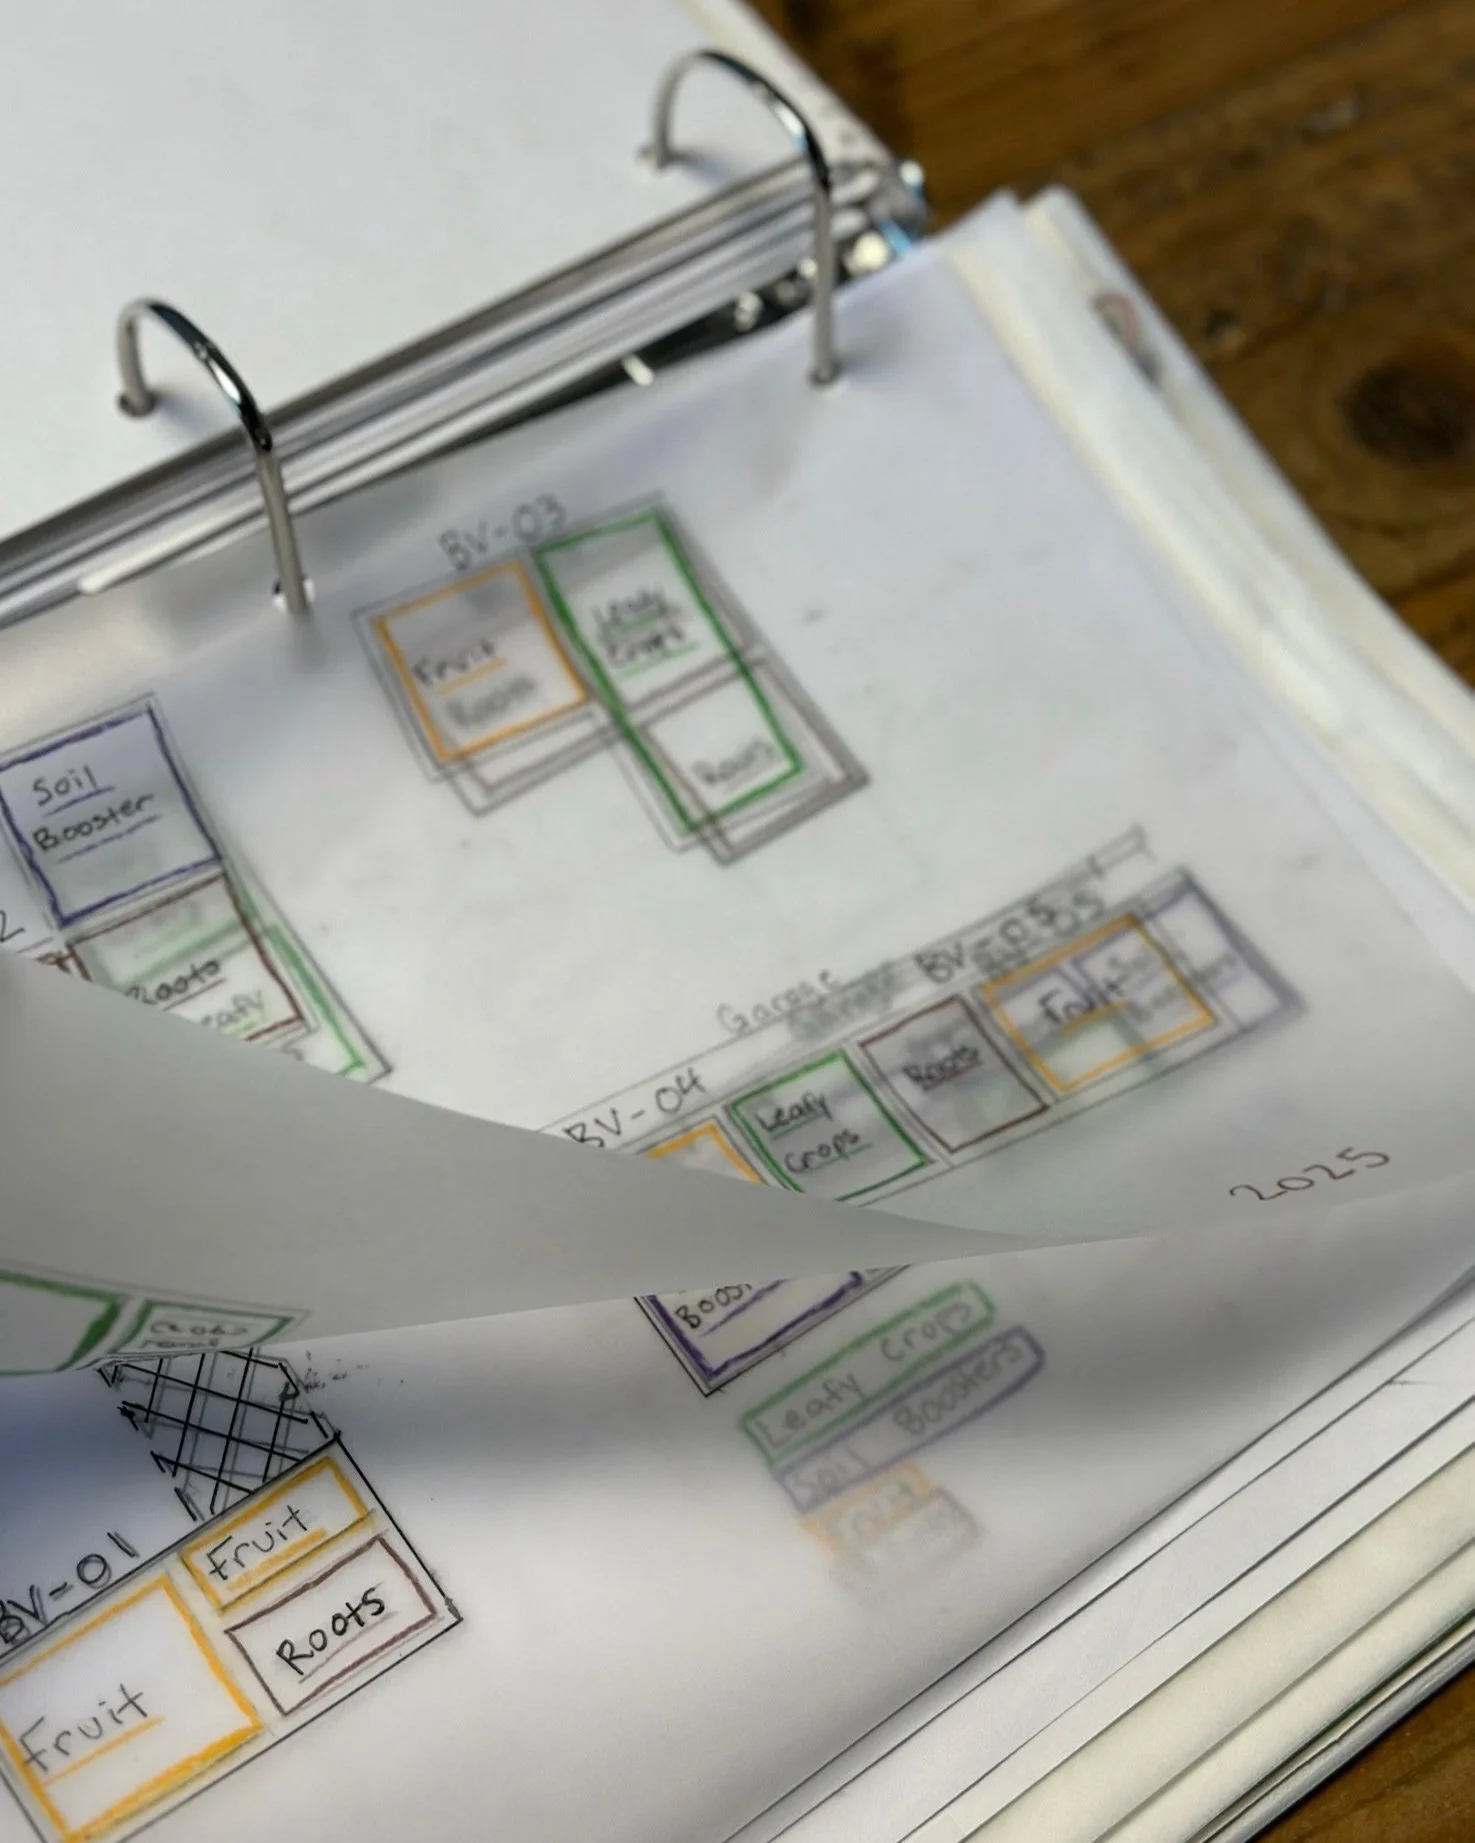
When it comes to designing your garden beds, we love working in two steps: first, moving possible plant ideas around with sticky notes, and then working with layering techniques using transparent paper to plan out the garden beds.
Begin by creating a comprehensive plant list. This list should include all the plants you wish to grow, along with their required plant spacing to ensure proper growth and airflow. Organize this information in a spreadsheet for easy reference. Once your list is ready, assign each plant a sticky note. Use different colours for various plant families or rotational categories. For instance, use orange sticky notes for root vegetables and green sticky notes for leafy greens. Label each sticky note with the specific plant species, such as "Adelaide hybrid carrots" for one orange sticky note and "German Butternut lettuce" for a green one.
Next, place the sticky notes on your garden outline. Consider the specific needs of each plant, such as shade tolerance and compatibility with companion plants. This step allows for easy rearrangement, helping you optimize your garden layout. Arrange plants based on their sunlight requirements and experiment with companion planting combinations.
Once you are satisfied with the placement of your sticky notes, refer to your spreadsheet to ensure correct plant and row spacing. This step is crucial for planning accurate placement. Then, use transparent overlays to create different layers for your garden plan. One layer can represent crop rotation, while another shows the actual placement of plants. This technique enables you to experiment with different arrangements without redrawing the entire plan.
To determine the number of plants per row, calculate by dividing the row length by the plant spacing (in inches or centimeters). This will give you the exact number of plants per row. Similarly, calculate row spacing using the bed width.
If you’re planning out your native companion plants, or even a separate native garden, consider using an additional transparent overlay to indicate seasonal flowers. This ensures that your garden provides year-round nectar sources, supporting local pollinators. We like to do this for our clients, so they can see what flowers each month.
Develop simple symbols to represent different plants, features, and elements in your garden. Include a legend on your sketch to explain these symbols for easy reference.
By following this detailed guide, you will have a well-visualized and organized plan for your future garden. This professional approach ensures that all elements are carefully considered, resulting in a thriving and productive garden space.