How to Plan Your Native Garden

Planning your garden bed on paper is a fantastic way to visualize the layout and ensure everything is in its ideal spot. But what if artistic skills aren’t your strong suit? No worries! Follow this step-by-step guide to help you get started with ease:
Measure Your Space:
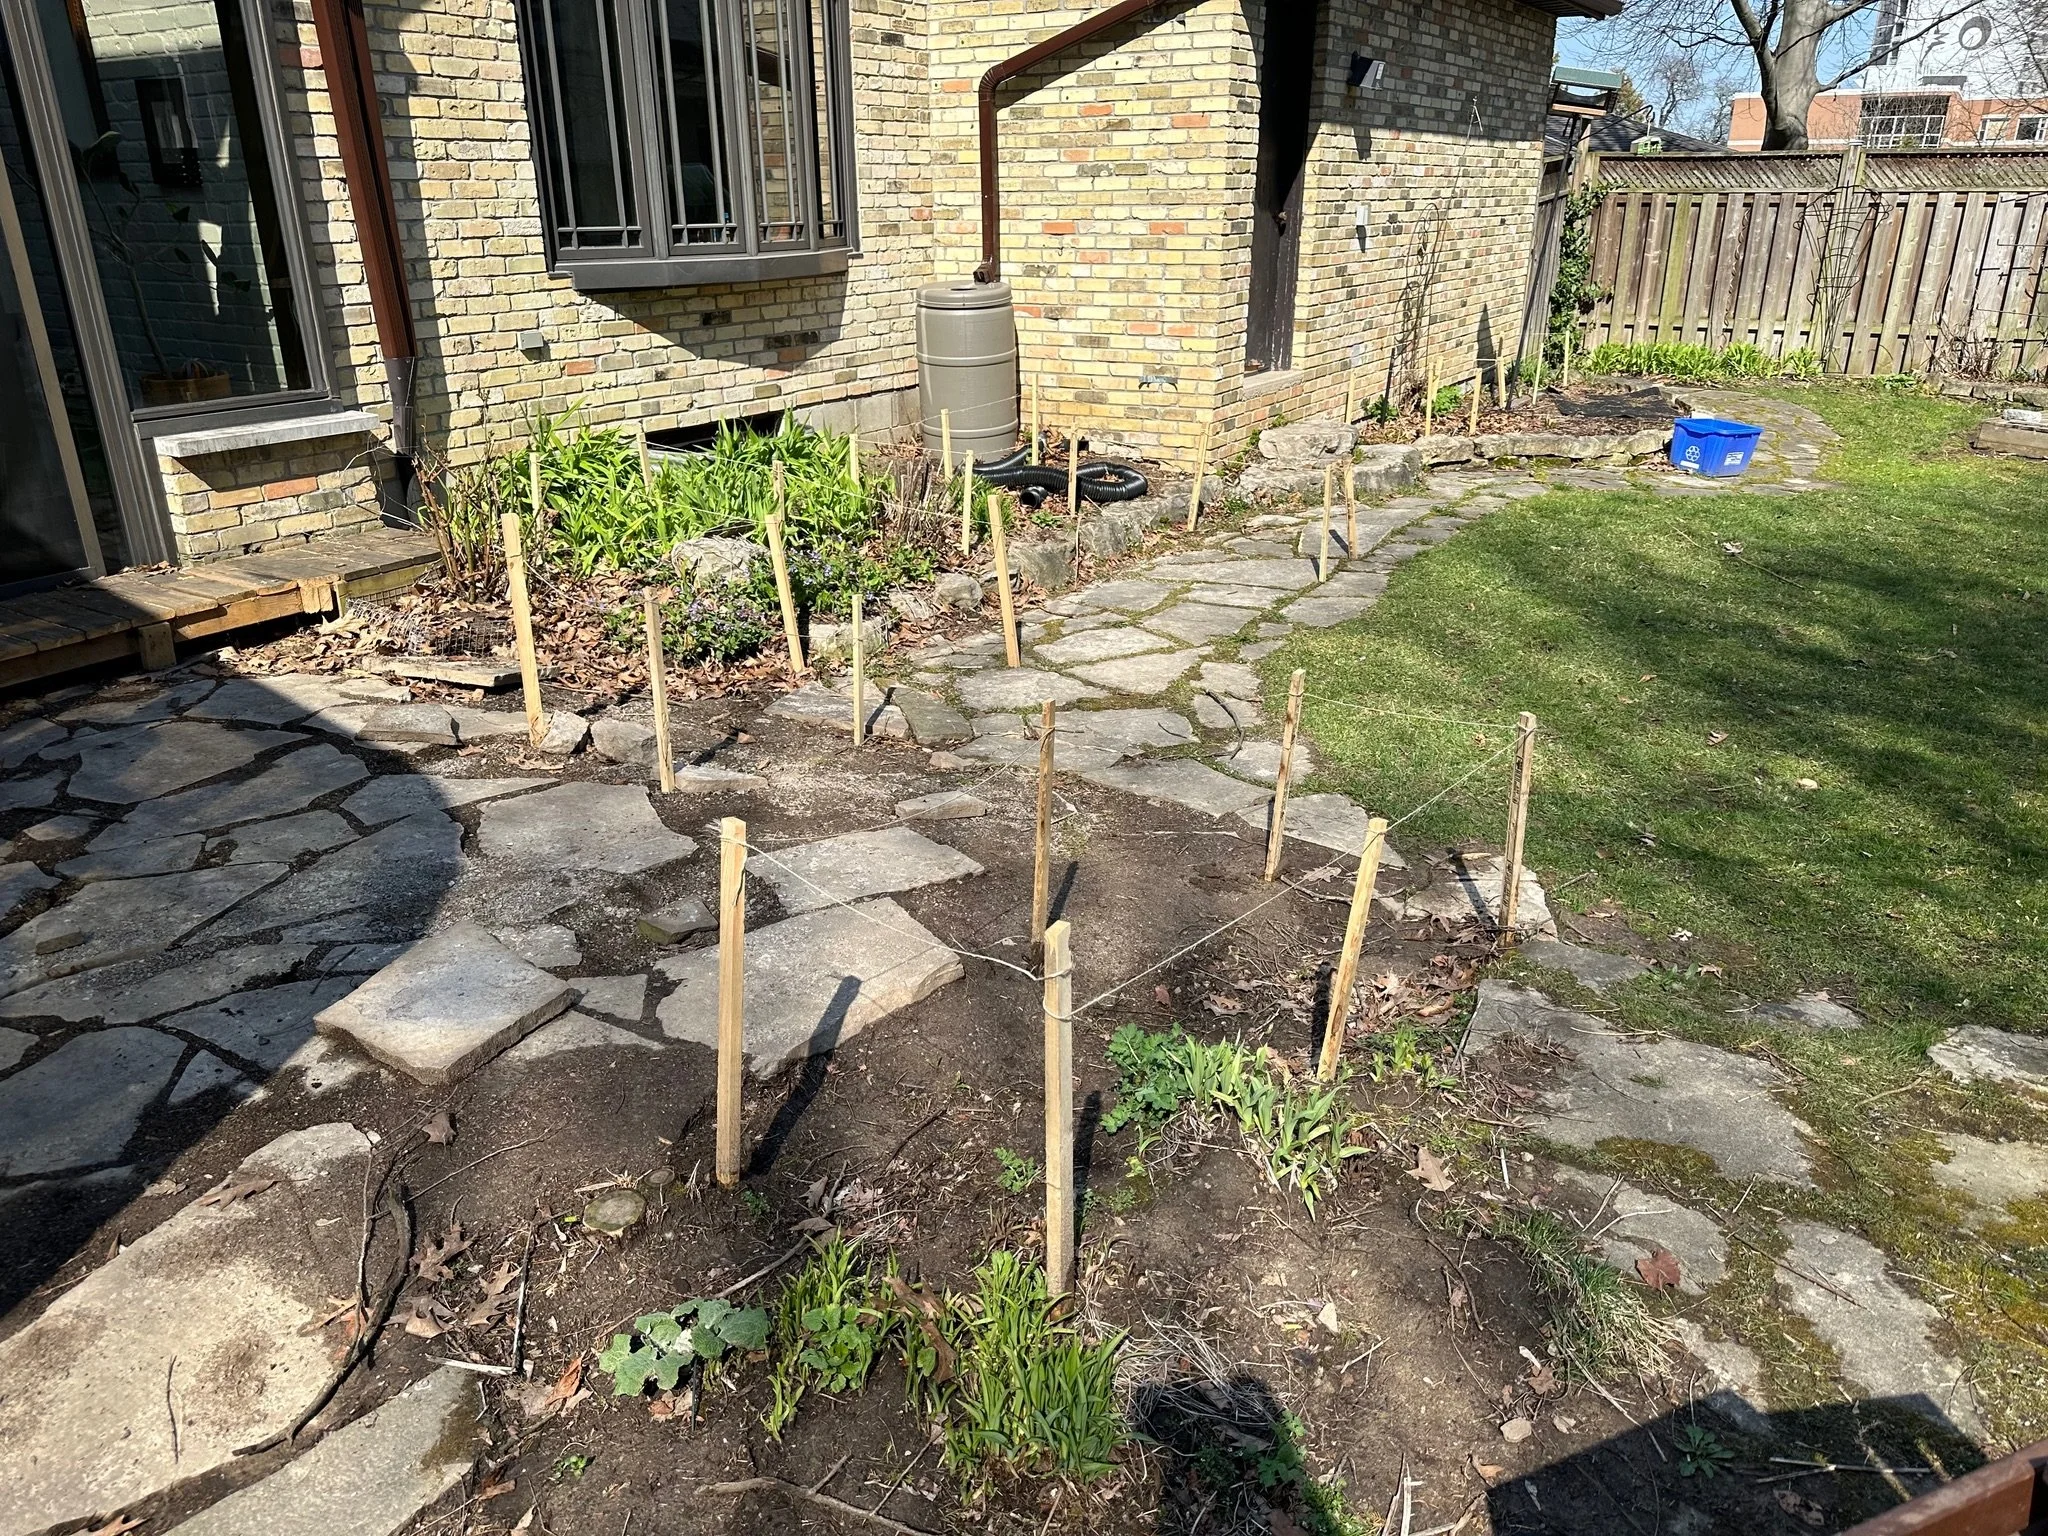
Gather a long measuring tape, a notepad, and a pencil to get started. Consider also using stakes and string, which can be incredibly helpful. When working with clients, we often use stakes and string because they provide a clear visualization of garden bed layouts. Once everything is set up, you might be surprised by the actual size of the garden space, and adjustments can be made effortlessly at this stage.
Before measuring, create a rough sketch of your garden area on paper. This will help you better visualize the space and keep track of measurements. Begin by measuring the length and width of the garden area. For irregularly shaped spaces, take measurements of all sides and record them on your sketch. If your garden is large or divided into different sections, break it into smaller, manageable areas. Measure each section separately and document the dimensions on your outline for clarity and accuracy.
Be sure to identify and measure any permanent features in your garden, like pathways, trees, sheds, or fences, and record their locations and dimensions on your sketch. If your garden includes slopes or uneven terrain, make note of these areas as they may require extra consideration during planning. For instance, freshly laid soil is prone to erosion during heavy rain unless stabilized by ground cover plants. You can add fast growing plants that will help keep the soil in place.
Draw Your Outline:
After collecting all your measurements, use graph paper to create a scaled drawing. You might choose a scale such as 1 square = 1 foot (or meter).
Start by drawing the outer edges of your garden on the graph paper, using your measurements and the chosen scale. Keep your lines neat and straight with a ruler. Now is also the ideal time to include any fixtures. Mark permanent features within the garden, like trees, sheds, pathways, or fences. Ensure these are accurately measured and drawn to scale in their correct locations. For features with irregular shapes, simplify them into easier forms, such as representing a tree canopy with a circle.
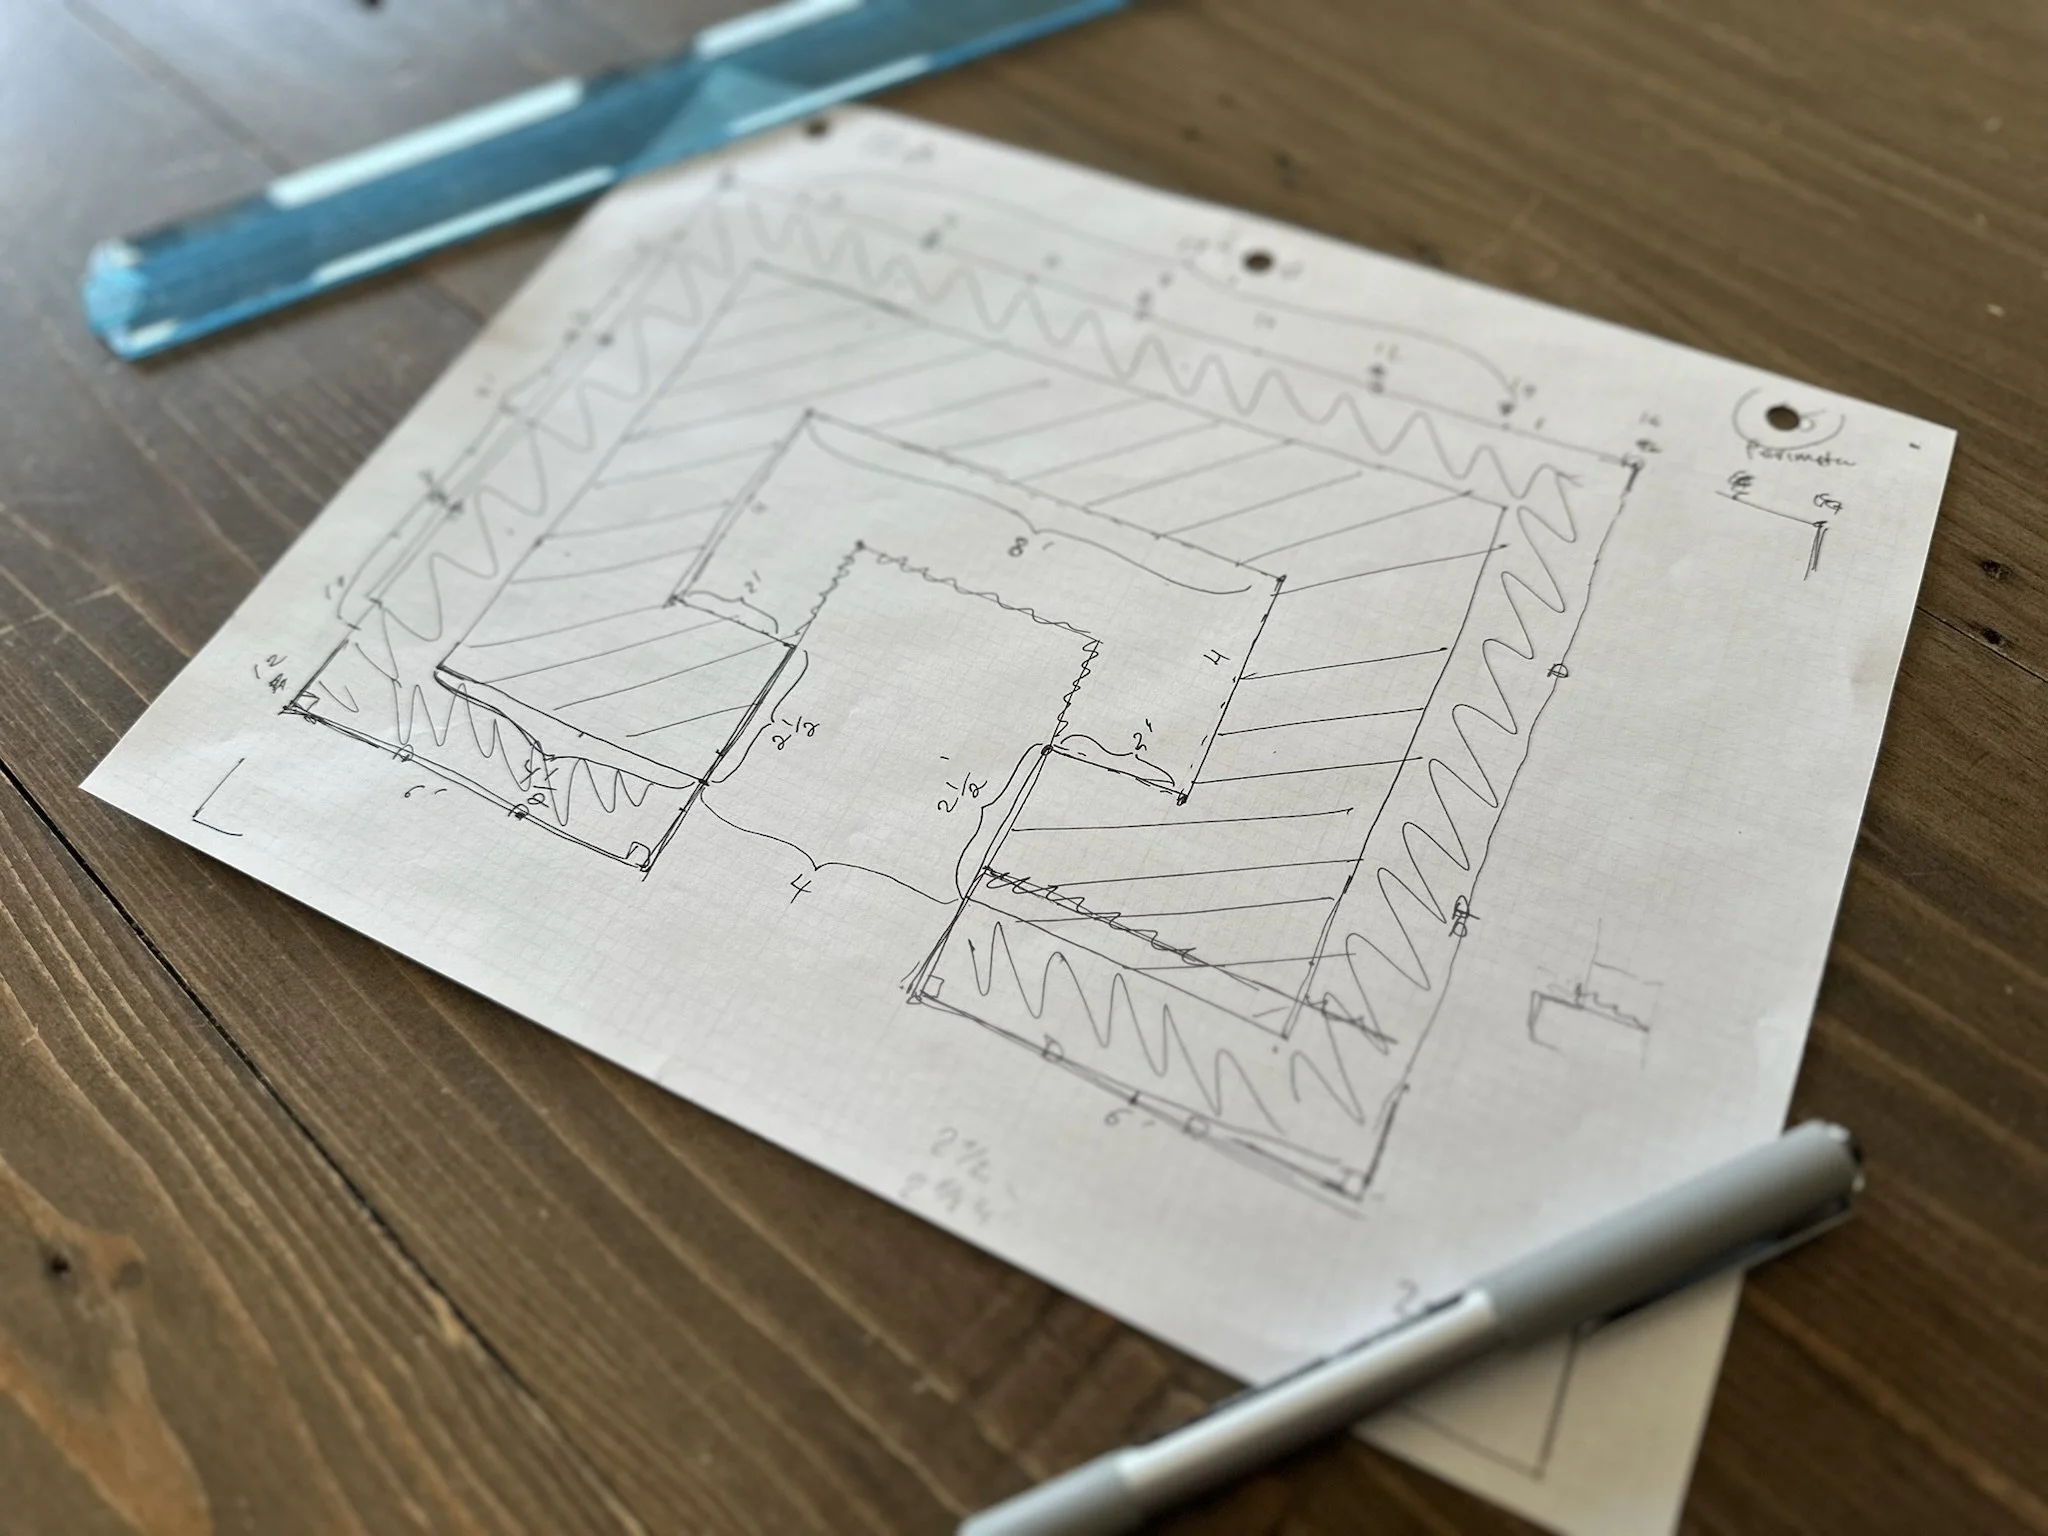
Next, add your garden beds and paths. Draw the shapes and positions of your garden beds, keeping in mind the dimensions you want them to be. Include pathways for aesthetic appeal and easy access to all areas of your garden. If you don’t have enough space for pathways through your garden beds, add a couple stepping stones so you can reach and tend to your plants.
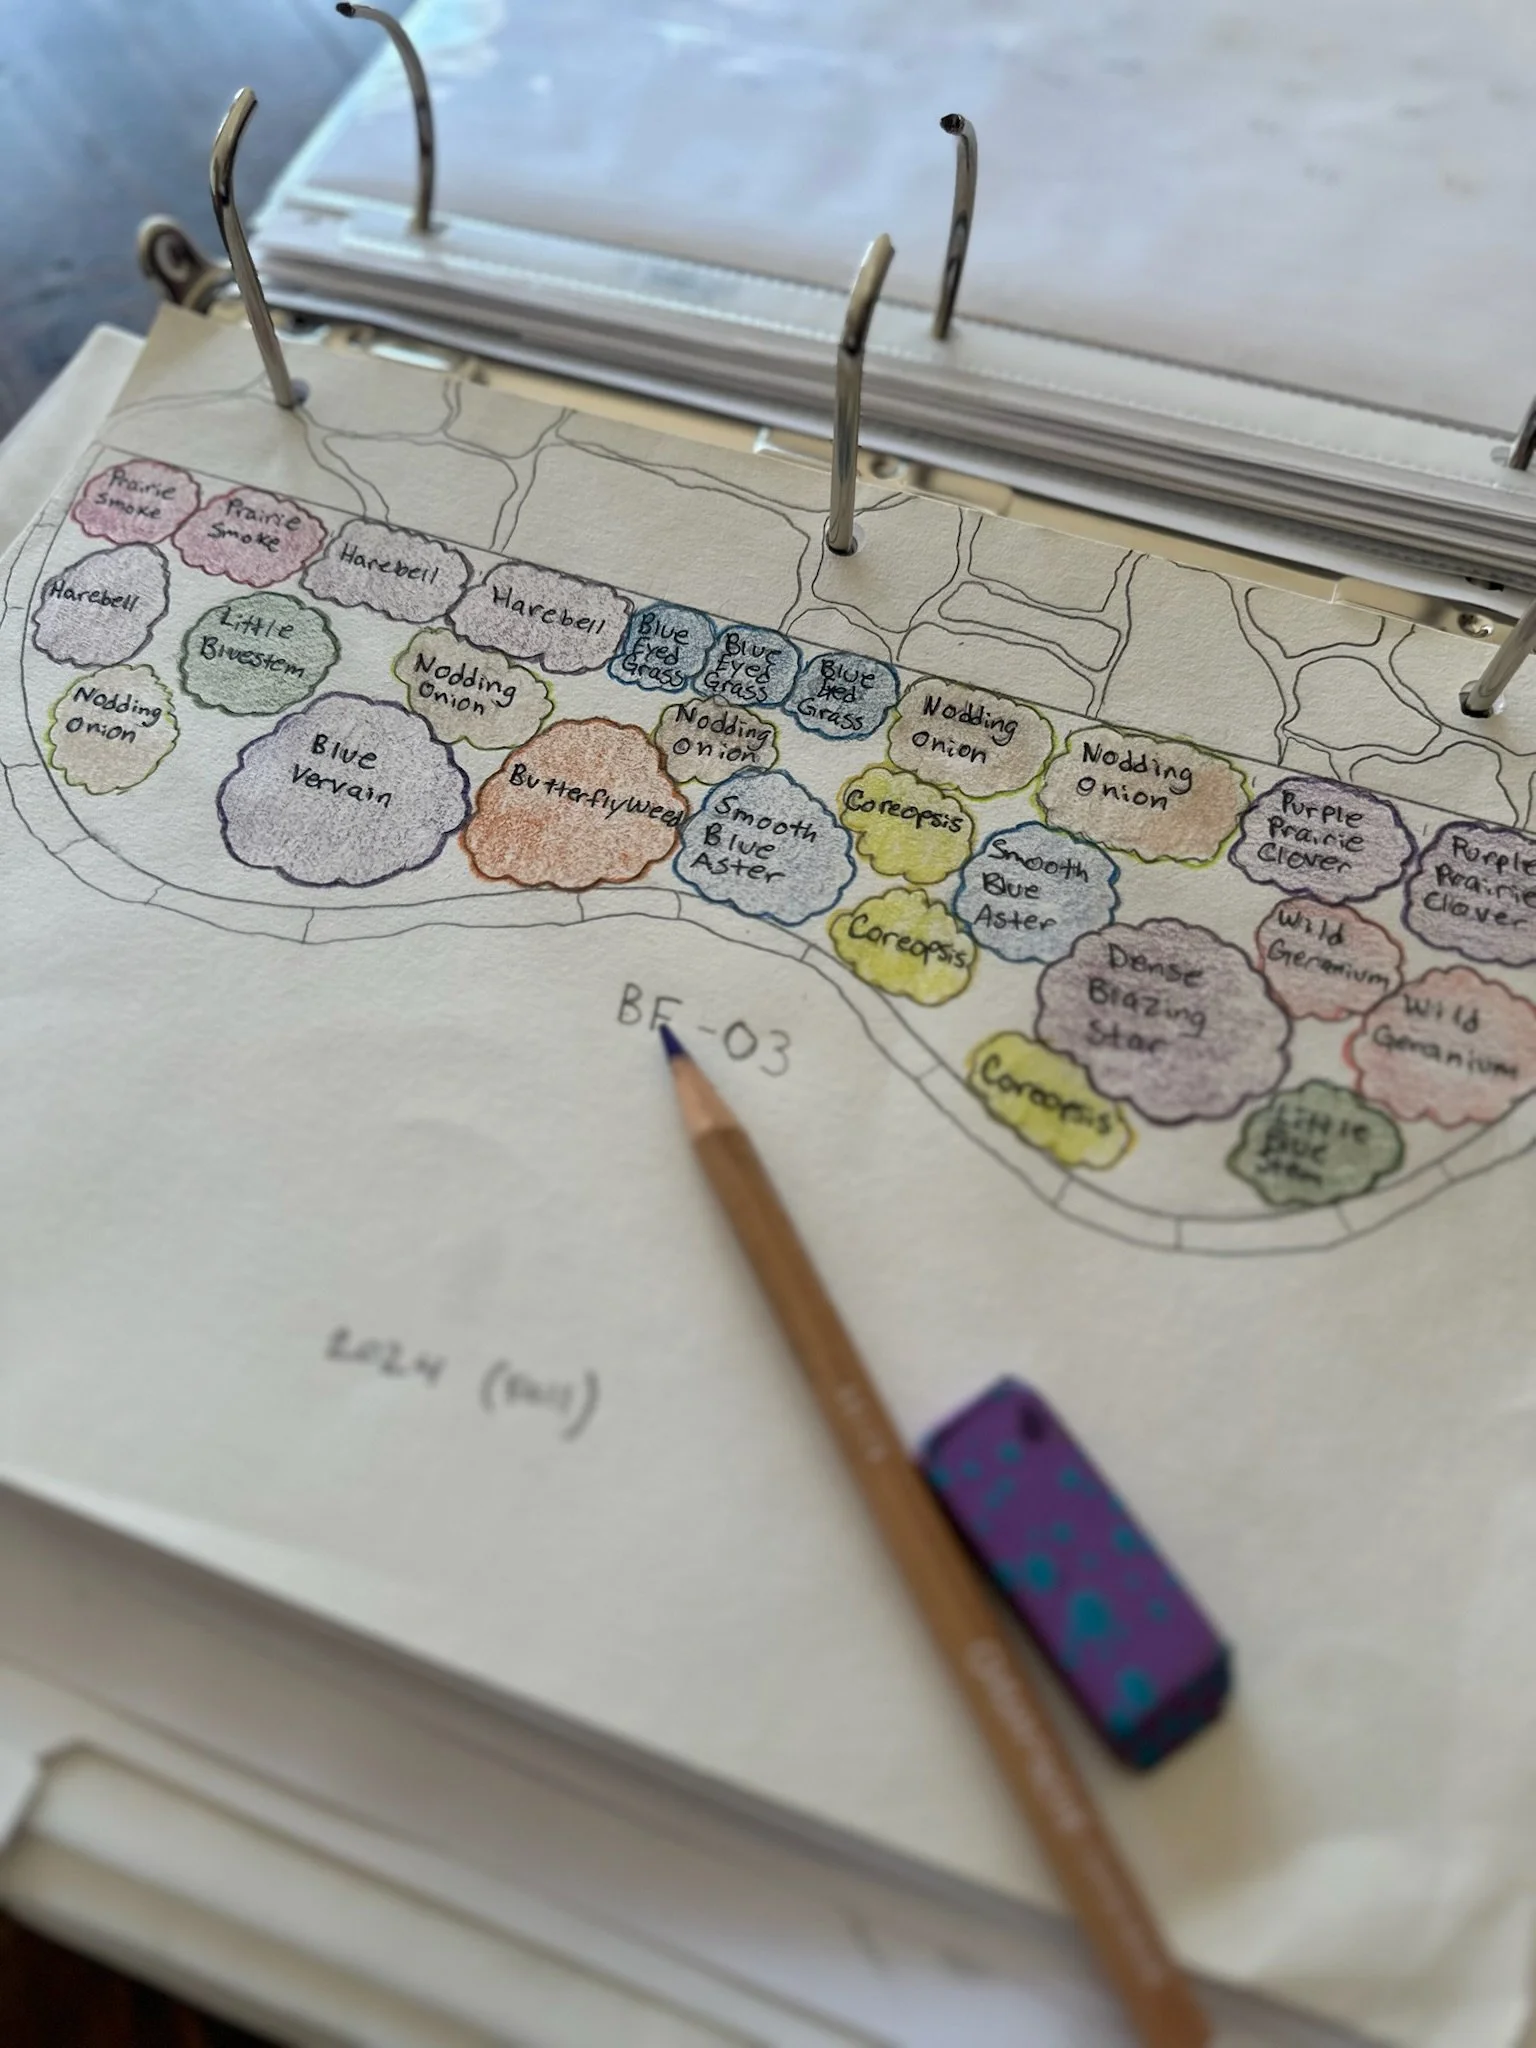
Label all parts of your garden clearly. Indicate the locations of specific garden beds, trees, and pathways. You can assign code names to your garden beds, which can help when referencing plant lists later. We use our clients' first names with "V" for vegetable beds and "F" for flower beds, followed by a number (e.g., BF-01, BF-02). If possible, also mark areas based on the amount of sunlight they receive (e.g., full sun, partial shade).
Designing Your Garden Beds:
Creating garden bed designs can be effectively planned through our two-step method: first, arranging potential plant placements using sticky notes, and then using transparent paper to layer and refine the design.

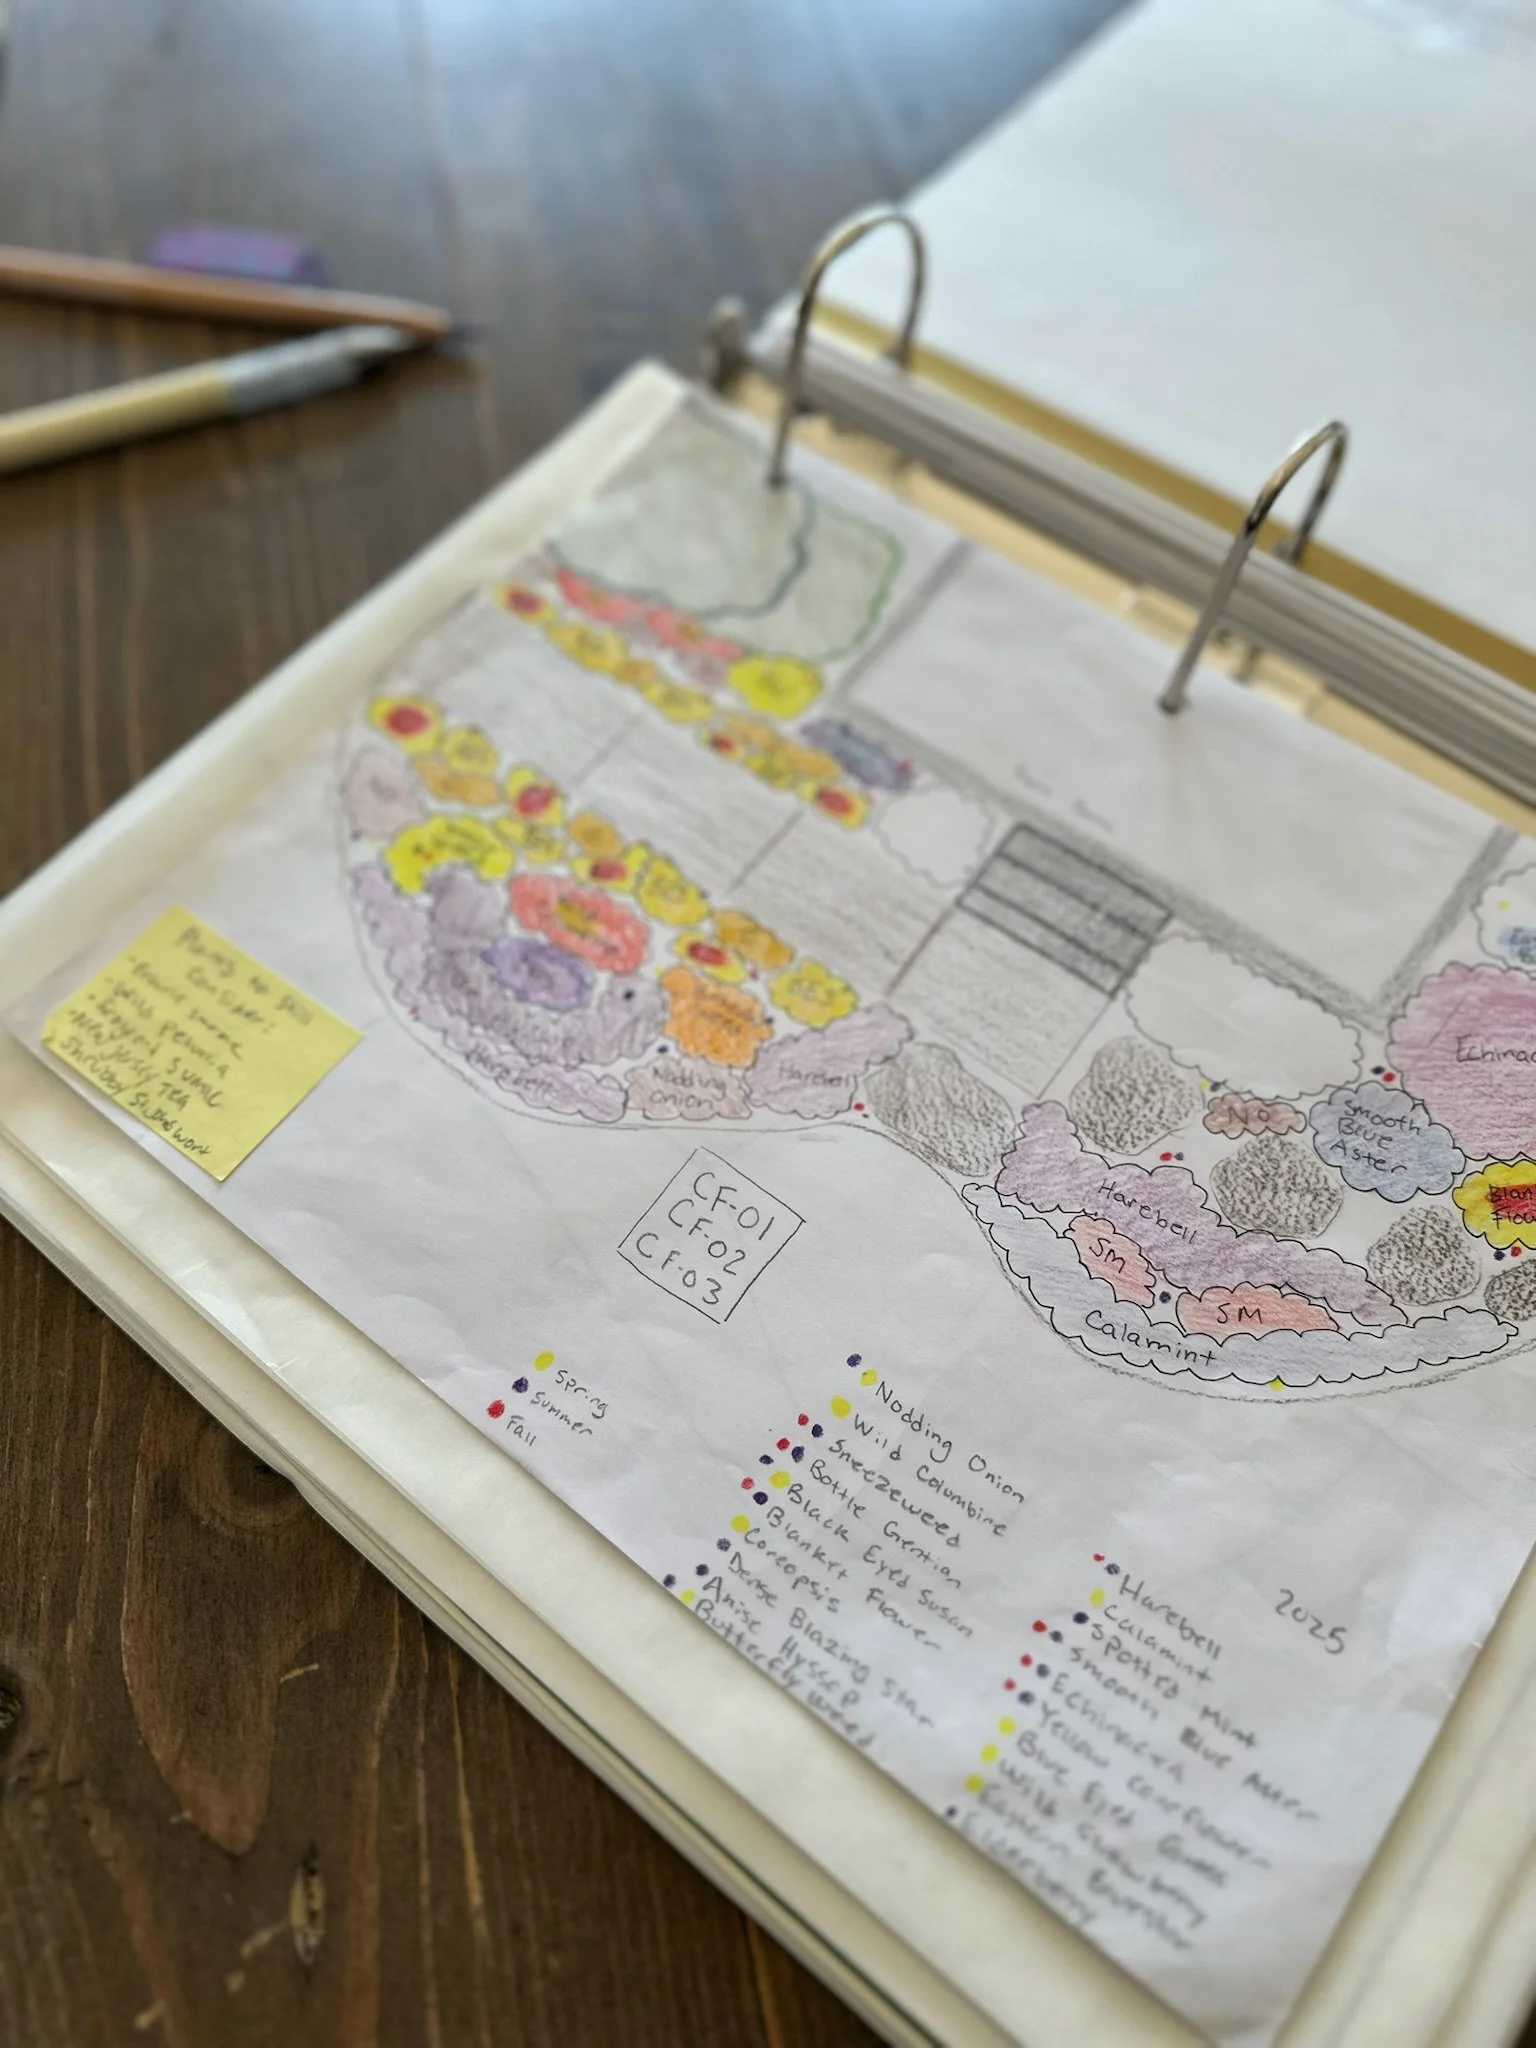
Compile a detailed plant list with all the plants you'd like to grow. The list should also include their height, sunlight, watering, and ideal spacing requirements. You can also add their blooming period and colour. Organize this information in a spreadsheet to refer back to. Feel free to use our plant characteristics spreadsheet example at the bottom of this page. Once your list is finalized, assign each plant to a sticky note. Use different coloured sticky notes to represent plant families or categories. Your can use pink for flowers and green for grasses. Label each sticky note with the specific plant species.
Next, place the sticky notes on your garden outline. Consider the specific needs of each plant and the garden bed conditions, such as sunlight exposure and moisture levels. This step allows for easy rearrangement, helping you optimize your garden layout.

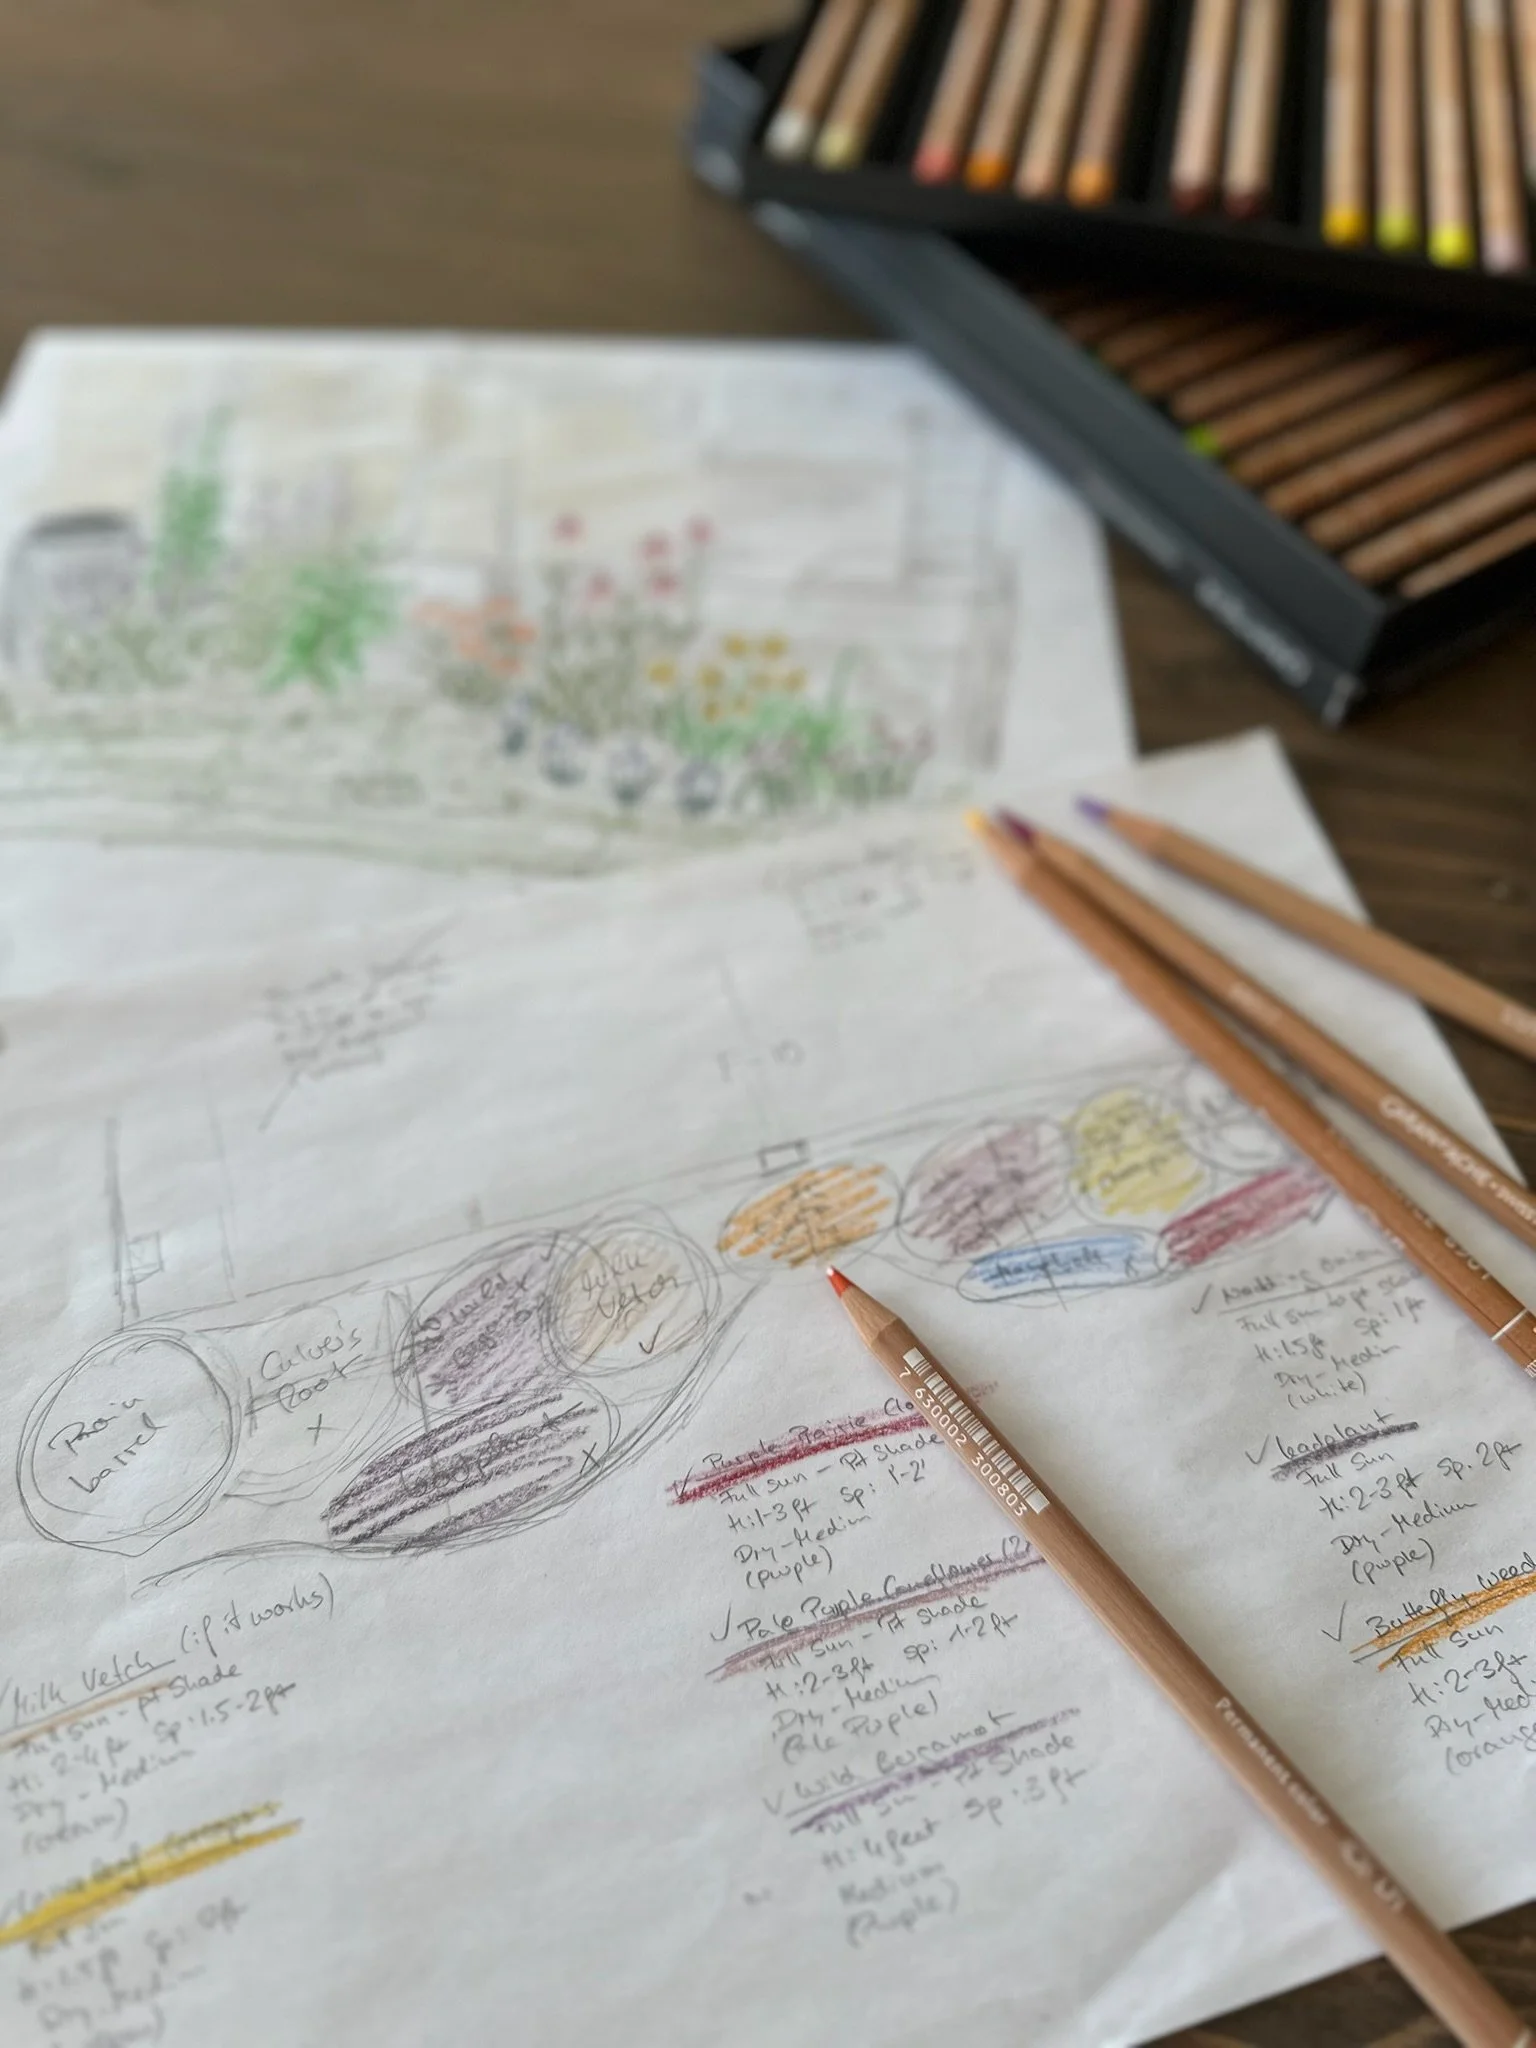

Once you’re happy with the sticky notes arrangement, double-check the placement against your spreadsheet to confirm proper plant spacing and height. This step is crucial for planning accurate placement. If you're using a layering approach, consider placing shorter plants along the borders and taller ones towards the back or middle. Pay attention to the flower colours as well, grouping plants with complementary blooms.

After that, use transparent overlays to map out different layers of your garden. Create separate layers for spring, summer, and fall, and colour in the flowers that will bloom in each season. This approach guarantees a garden that offers consistent nectar sources throughout the year, supporting local pollinators. We often provide this layered view to clients so they can visualize which flowers will bloom each month.
Develop simple symbols to represent different plants, features, and elements in your garden. Include a legend on your sketch to explain these symbols for easy reference.
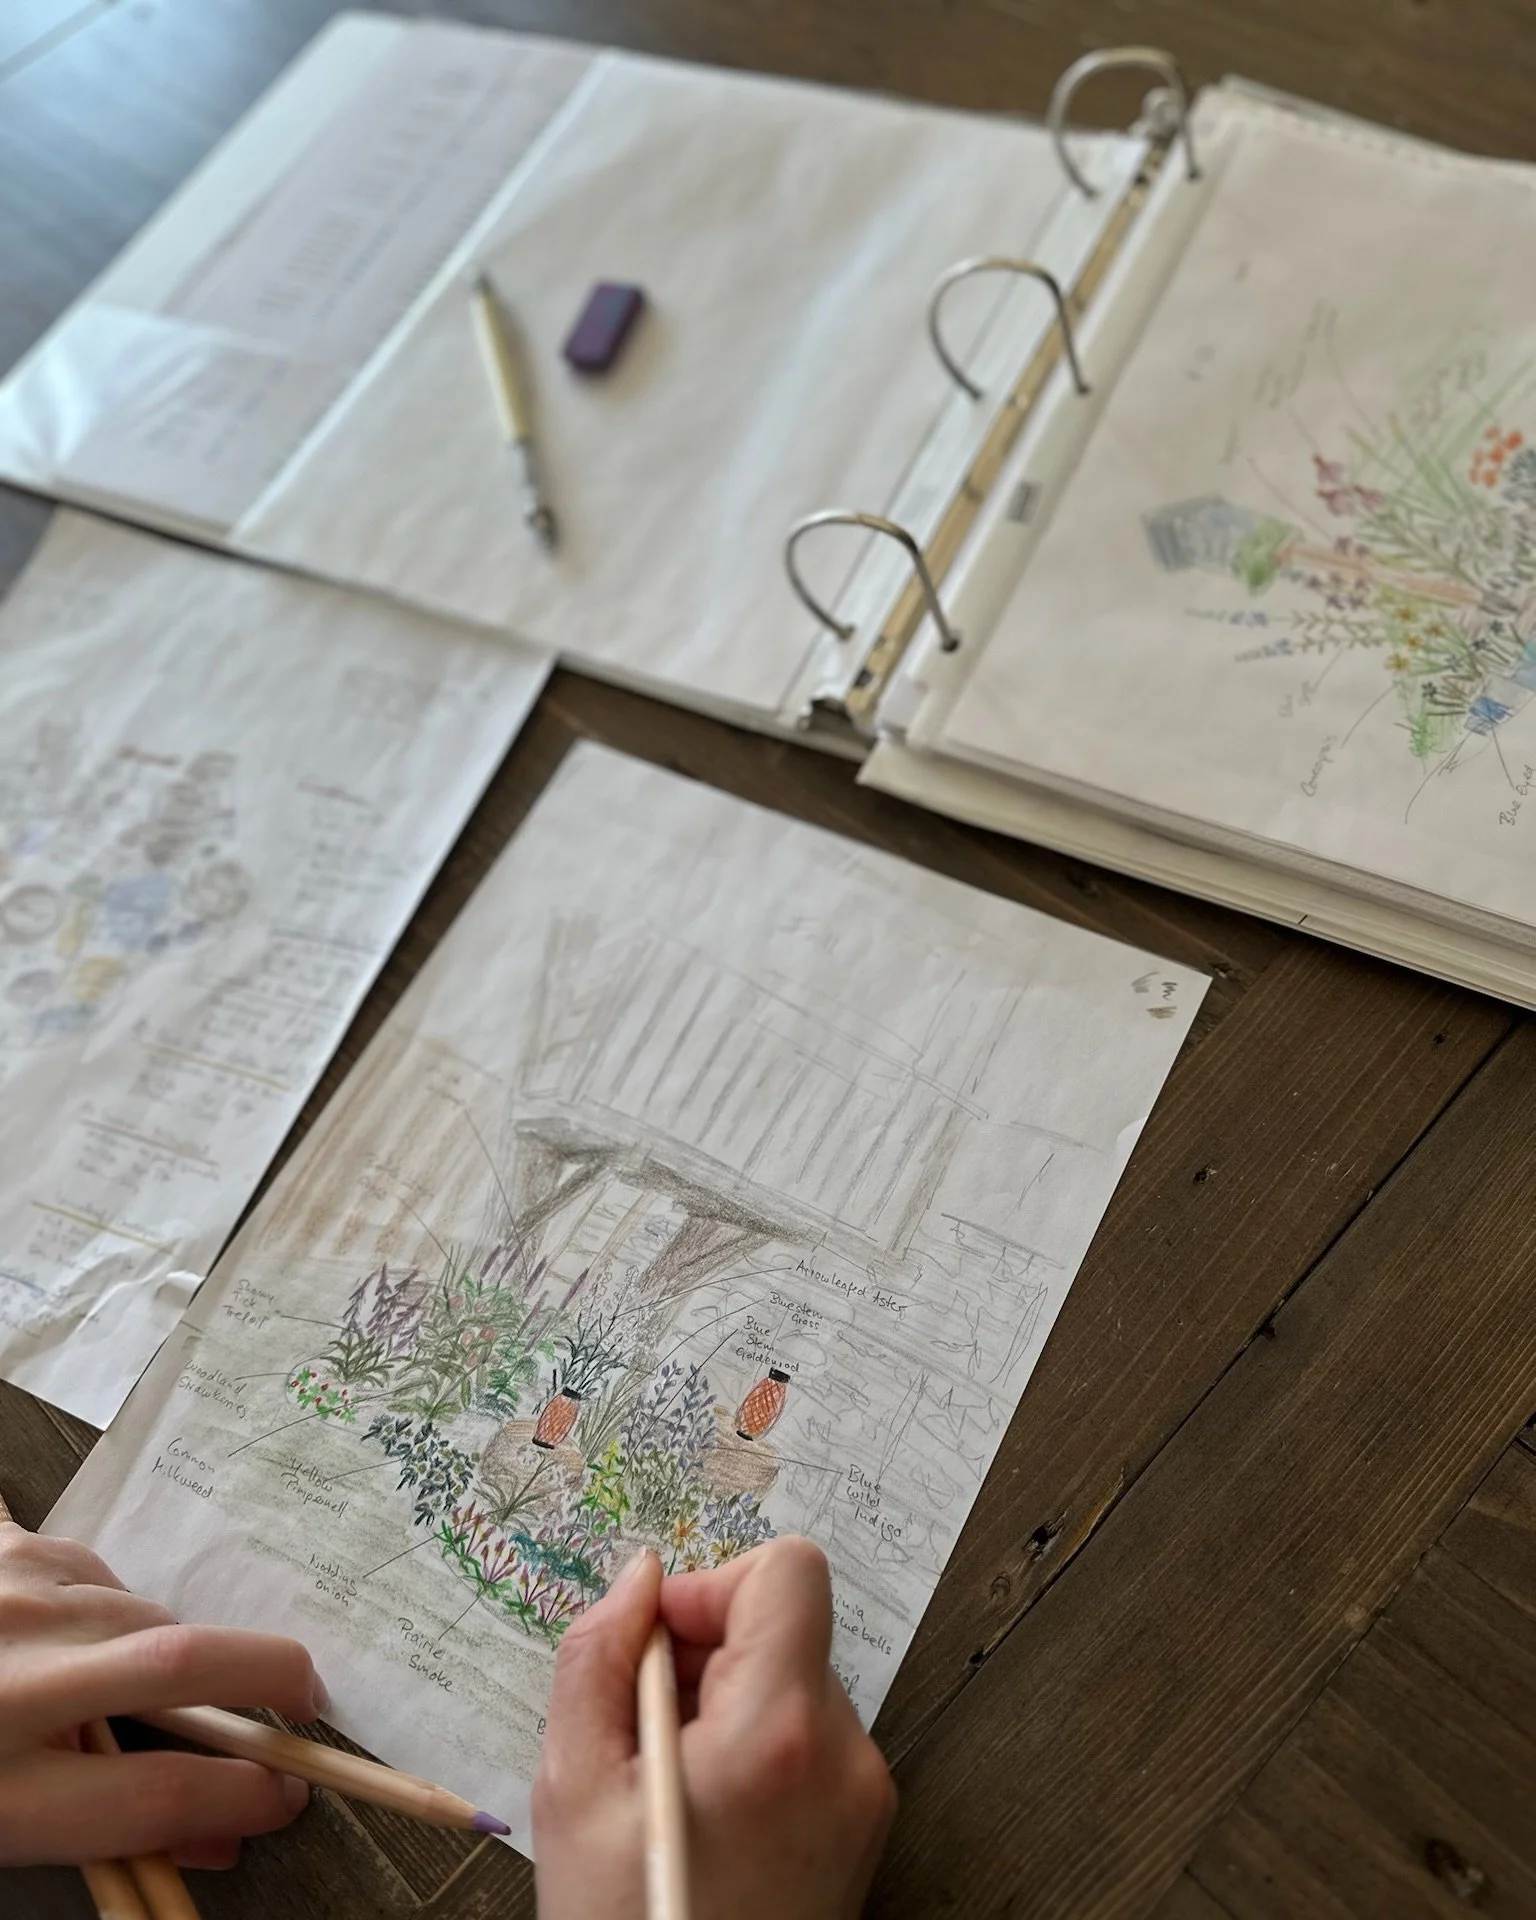
If you have a passion for drawing and wish to visualize your garden more clearly, consider creating an illustration that includes all the plants. It can turn into a piece of art! This is a technique we often use with new clients to help them better understand their garden design. It truly brings the plan to life and builds excitement for the transformation ahead. However, keep in mind that not all plants will bloom simultaneously, so the drawing may not fully reflect the garden's appearance at any given time.
By following to this comprehensive guide, you can produce a clear and structured plan for your garden. This approach guarantees thoughtful consideration of every detail, paving the way for a flourishing garden environment.
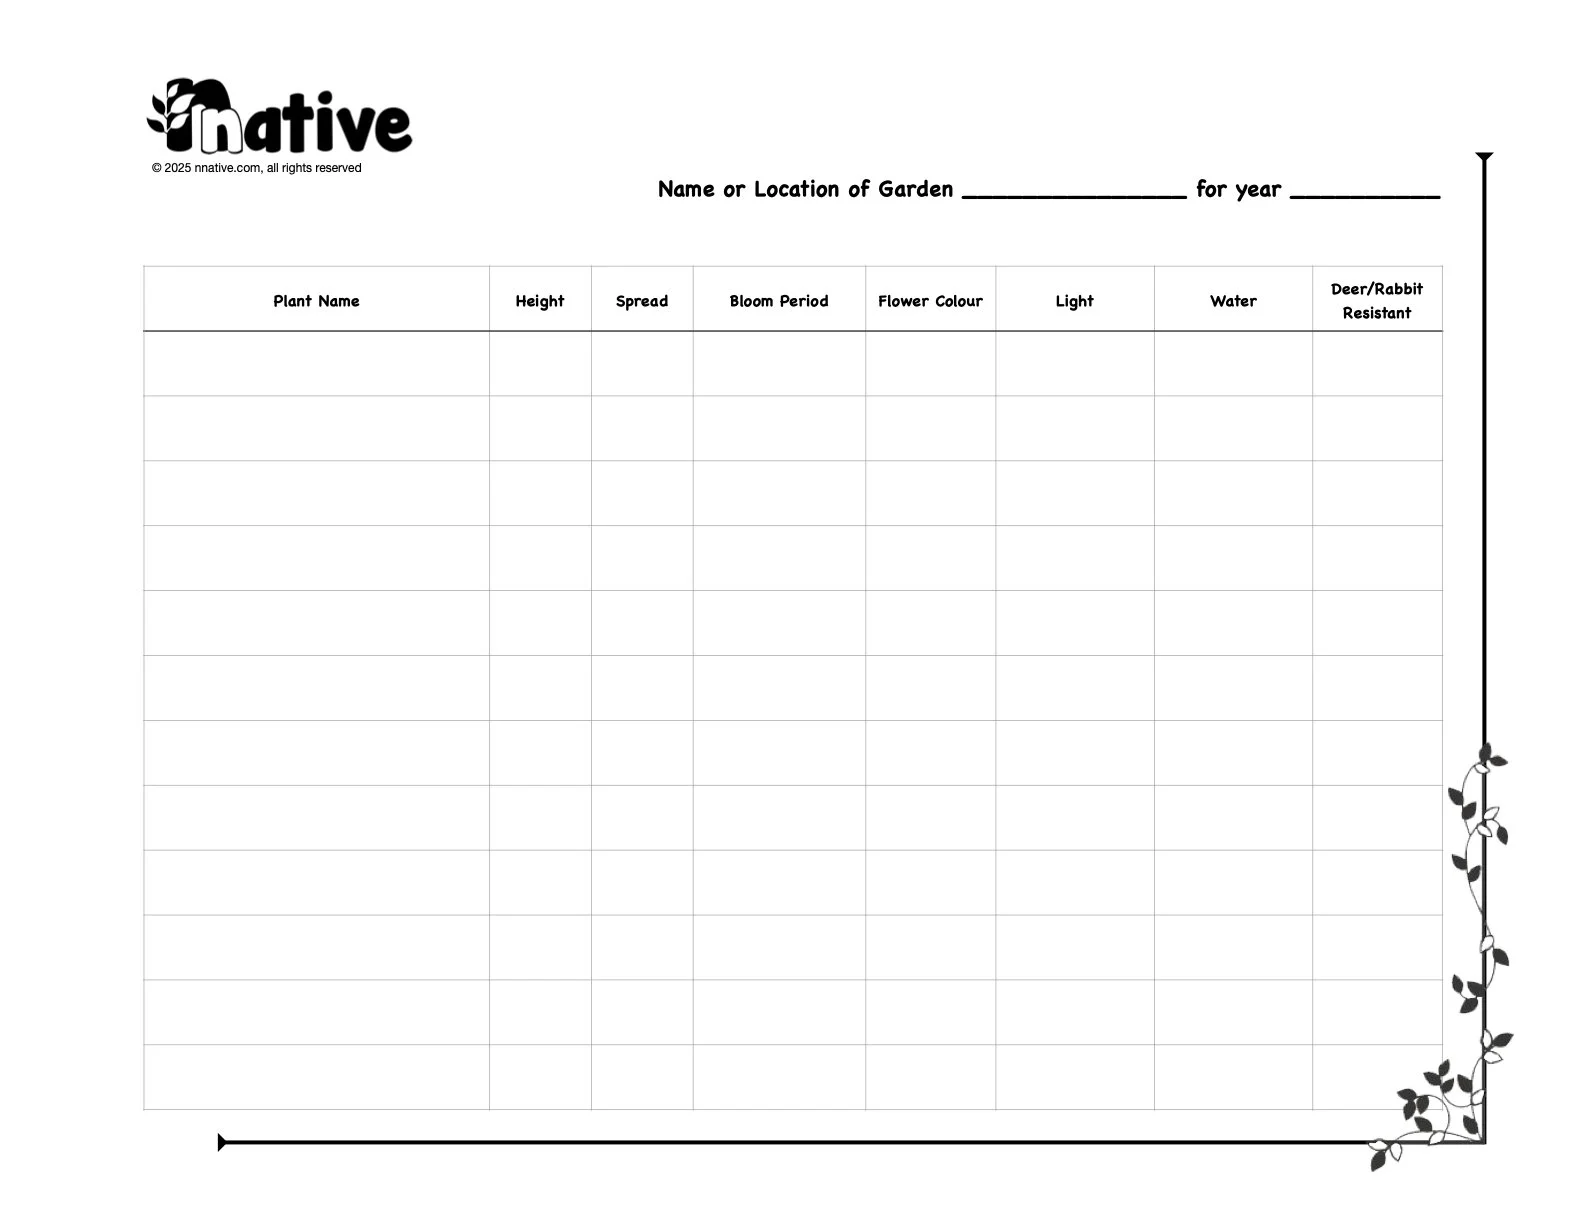
You can use this plant characteristics spreadsheet while planning your native garden.